Project
Install Oracle Enterprise Linux and Oracle Database 19c on a dual boot Windows 10 machine.
This will be a full Oracle install including ASM and grid for my professional experience rather than a minimal database under a virtual box.
Note that I do not have a service contract with Oracle, am not paying $500 for one for my personal use, and therefore cannot get to the support documentation or the Oracle Unbreakable Linux Network (ULN). This includes all of the bug fixes and reports and lots of helpful information. If you run into trouble without this you are SOL. I learned the hard way to stick with the supported releases rather than go off trying to figure it out. I spent a week with Ubuntu and then another few days with Oracle Enterprise Linux 8 latest and greatest (which is not supported for Oracle 19c!!!). Just don’t do it. Frustration will be immense if you cannot get to the support documentation. [Note: You can get the database to install, but grid is another matter].
This is our Home Theatre PC. Other than acting as a file server, the main usage it gets is Netflix via a web browser. That will work just find under Linux too, so I’m hopeful wife won’t mind which OS is running most of the time. That is the goal.
Credits
I found all sorts of references using google searches and learned from them (as well as having been doing similar stuff for 35 years including sysadmin a very long time ago). Unfortunately, I did not save links except in a few cases where I included them. Rest assured though that if you google any of these subjects you will hit the same resources that I worked my way through. I wish I had done a better job with it. Nobody can know all this stuff. I mostly just fumbled my way through.
Hardware
- Intel NUC 7i5BNH with 512GB SSD with windows 10 installed.
- LaCie d2 Professional SCSI Disk Device 4TB Thunderbolt USB drive ($200!!!!). It isn’t SSD but it is an enterprise level 4TB disk drive that is plenty fast through the USB-C Thunderbolt interface. I’ll be installing Oracle Linux and Oracle database on this drive.
- “My Book” 3TB USB drive for windows public smb share for photos. This drive is shared by the windows boot as our “G” drive and I’ll be making the Linux boot share it the same way. The clients use the IP address to mount it and don’t care whether the machine is booted as Windows or Linux.
- Although you can shrink the space on main windows drive and install Linux, I’m installing everything on the 4TB Lacie Thunderbolt disk. I’m leaving the main windows drive completely alone, though the boot loader may get touched along the way. My expectation is I can recover completely to the windows normal boot if needed.
Partitioning the Drive
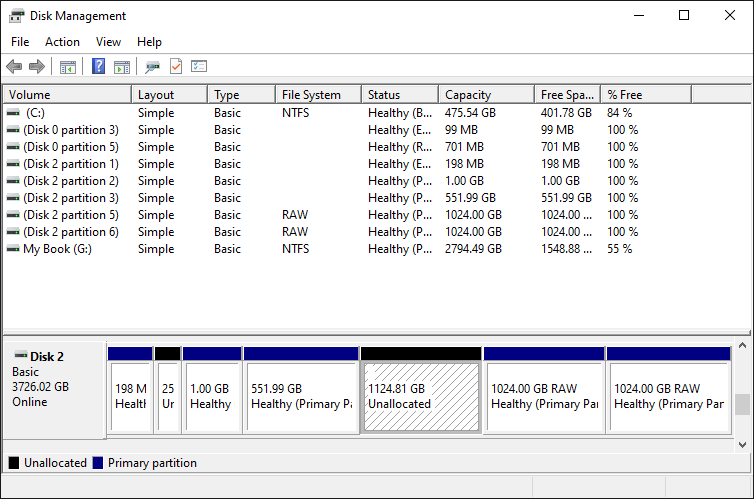
Although you can let the Oracle Linux installer do this, it doesn’t behave the way I want. I want a raw partition to use with ASM for the Oracle data disks. I couldn’t figure out how to make the installer create that partition without putting a file system on it, so I would have to come back and do it later anyway. I found it easier just to use the Windows “Disk Management” tool to do it (or you can boot a gparted image from USB, but I didn’t find it necessary). On windows hit Start then type in “Disk Management”. I decided on the following:
- 200 MB (198) partition for EFI /boot/efi
- 1 GB partition for /boot
- 552 GB partition for Volume Manager
I wanted to leave room for the volume manager partition to grow so I created a partition with 1124.81 GB (the remainder) that I later removed leaving a gap. I realize the volume manager probably could have dealt with it just fine with it split across the disk, but I haven’t explored it yet.
I was going to create a 2TB partition for ASM, but ran into a snag (it was slightly over). The documentation says the 2TB limitation is fixed after Oracle 11, but it is apparently still a problem. Breaking it into two 1TB partitions works fine and also gives me more chance to play with ASM. So, two 1024 GB (1048576 MB) partitions after the gap to use with ASM.
After creating the two partitions for ASM, I deleted the place holder for the volume manager partition growth (1124.81 GB now unallocated). The resulting allocation looks like this (DISK 2 which is the Lacie drive):
BIOS Setup
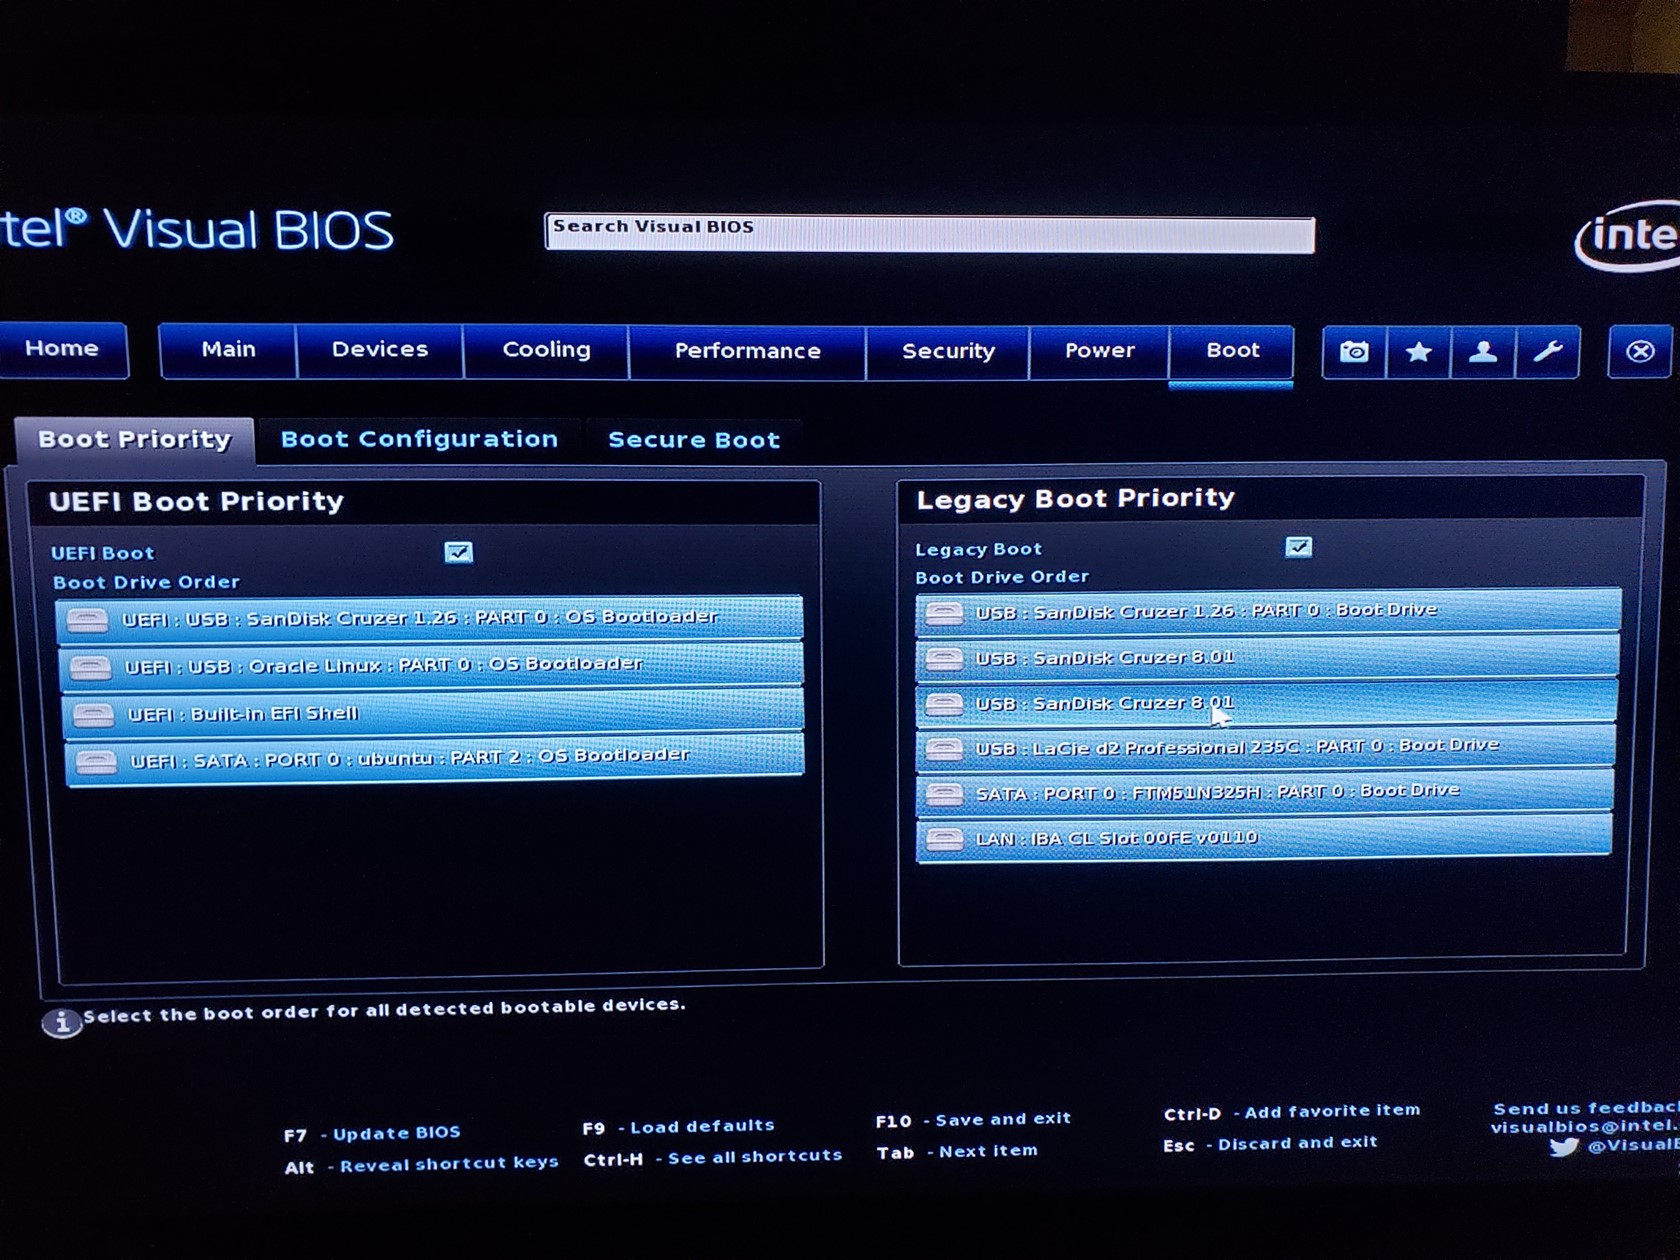
While in Windows you may want to Turn off Fast Startup. If you google it you will find plenty of entries on how to do it. I don’t think it actually matters for this and it might get turned back on by windows update, but there are reports of it interfering with dual boot. On my machine I have to press F2 during startup during a very limited period to get to the bios setup. While there I can extend that time so it isn’t so hard to catch it. Now I don’t remember where exactly I found that on the NUC bios, but it waits 5 or 10 seconds for keyboard interrupt now on a power cycle. Turn off Fast Boot and make sure Secure boot is off. Make sure boot from USB is turned on. Here are some pictures of my bios screen. Not sure how useful they will be, but can’t hurt:

Download the Oracle Linux Distribution
I learned the hard way that the latest and greatest distribution (OL 8) is not supported for the Oracle database 19c!!!!!!! Go to the Oracle database documentation to find a table with supported Linux releases. At this time, it is OEL 7.4 with Unbreakable Kernel 5 (which is included by default). But I found out that when you auto update 7.4, you wind up with 7.8. I hope it will work because 7.4 unbreakable linux kernel did not support my network card. In any case I’m going to try 7.8
Go to the Oracle.com website and fumble around until you get to the dropdown menu that has On Premise Products/Software. Pick Oracle Linux. From there you can get to Download Oracle Linux which takes you to edelivery.oracle.com. From there you have to create an account or sign in. You do not need a support contract for this.
Search for Oracle Linux. Choose DLP: Oracle Linux 7.8. I know you want that tasty looking 8. Don’t do it. 7.8 is last supported release for the database. Add it to your cart and then go to Checkout on top right.
Pick x86 64bit for Platforms/Languages. Don’t freak out at the 14.0 GB, we will trim it down on the next step. Hit continue. Agree to the license. Get rid of the feedback popup. Uncheck everything by unchecking top level. Then go back and pick:
V995537-01.iso Oracle Linux Release 7 Update 8 for x86 (64 bit), 4.5 GB
That’s all you will need. Note that if you use the wget option, that shell script invokes wget with ask-password which the manual says will prompt for it, but I think it directed the prompt to stderr which was writing to a log file. I entered the password even though not prompted and it started downloading.
Download Oracle Grid and Oracle database 19c
Also get grid install and Oracle 19c from edelivery.oracle.com. You should be able to find them by searching. I did not take a screenshot of this. I have the files locally:
\-rwxrwxrwx. 1 nobody nobody 3059705302 Apr 29 10:55 LINUX.X64\_193000\_db\_home.zip
\-rwxrwxrwx. 1 nobody nobody 2889184573 Apr 29 10:55 LINUX.X64\_193000\_grid\_home.zip
Burn ISO image to USB stick
Download rufus executable for windows. You don’t even have to install it. Just download it to the same place as your iso file. You can use that to create the bootable USB.
You can find plenty of instructions on the web about how to do that. The only non-obvious thing is choose FreeDOS for the format. I don’t know why, but it works. Install the iso file onto the USB.
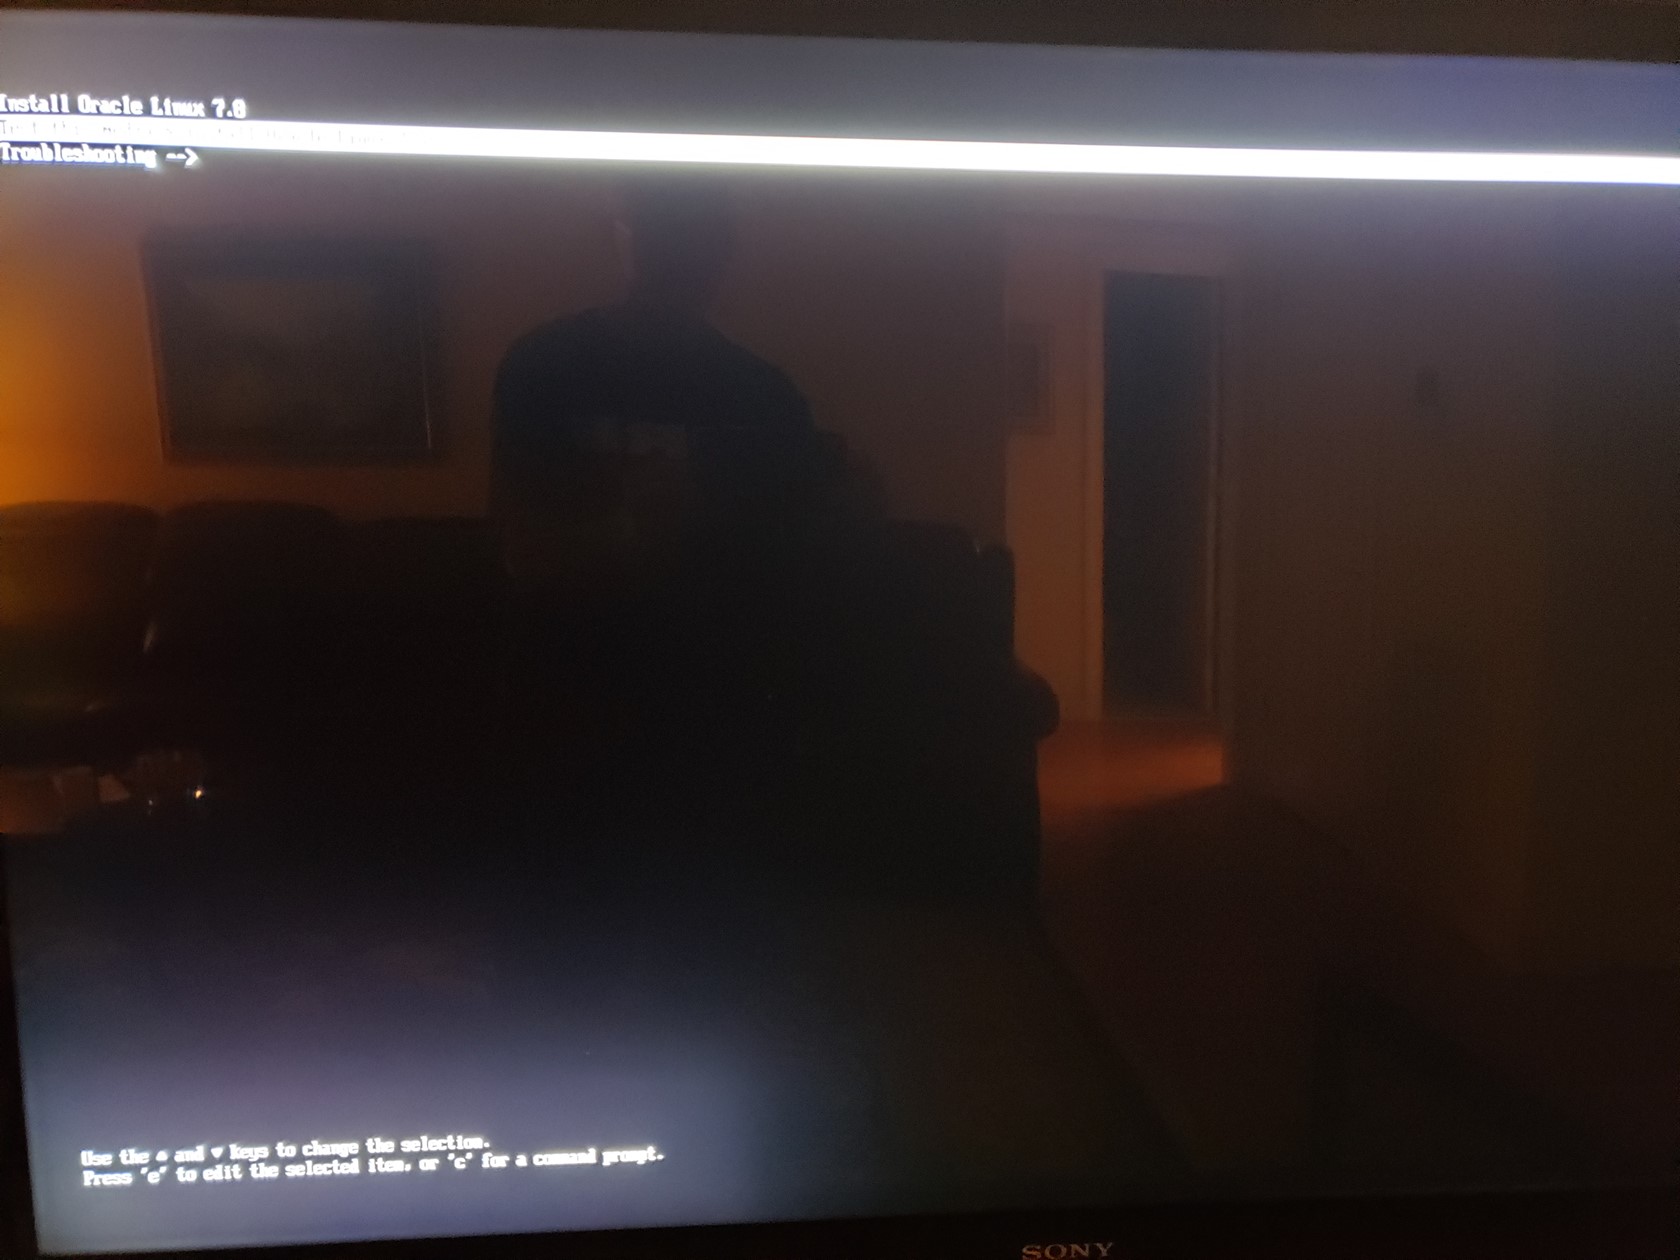
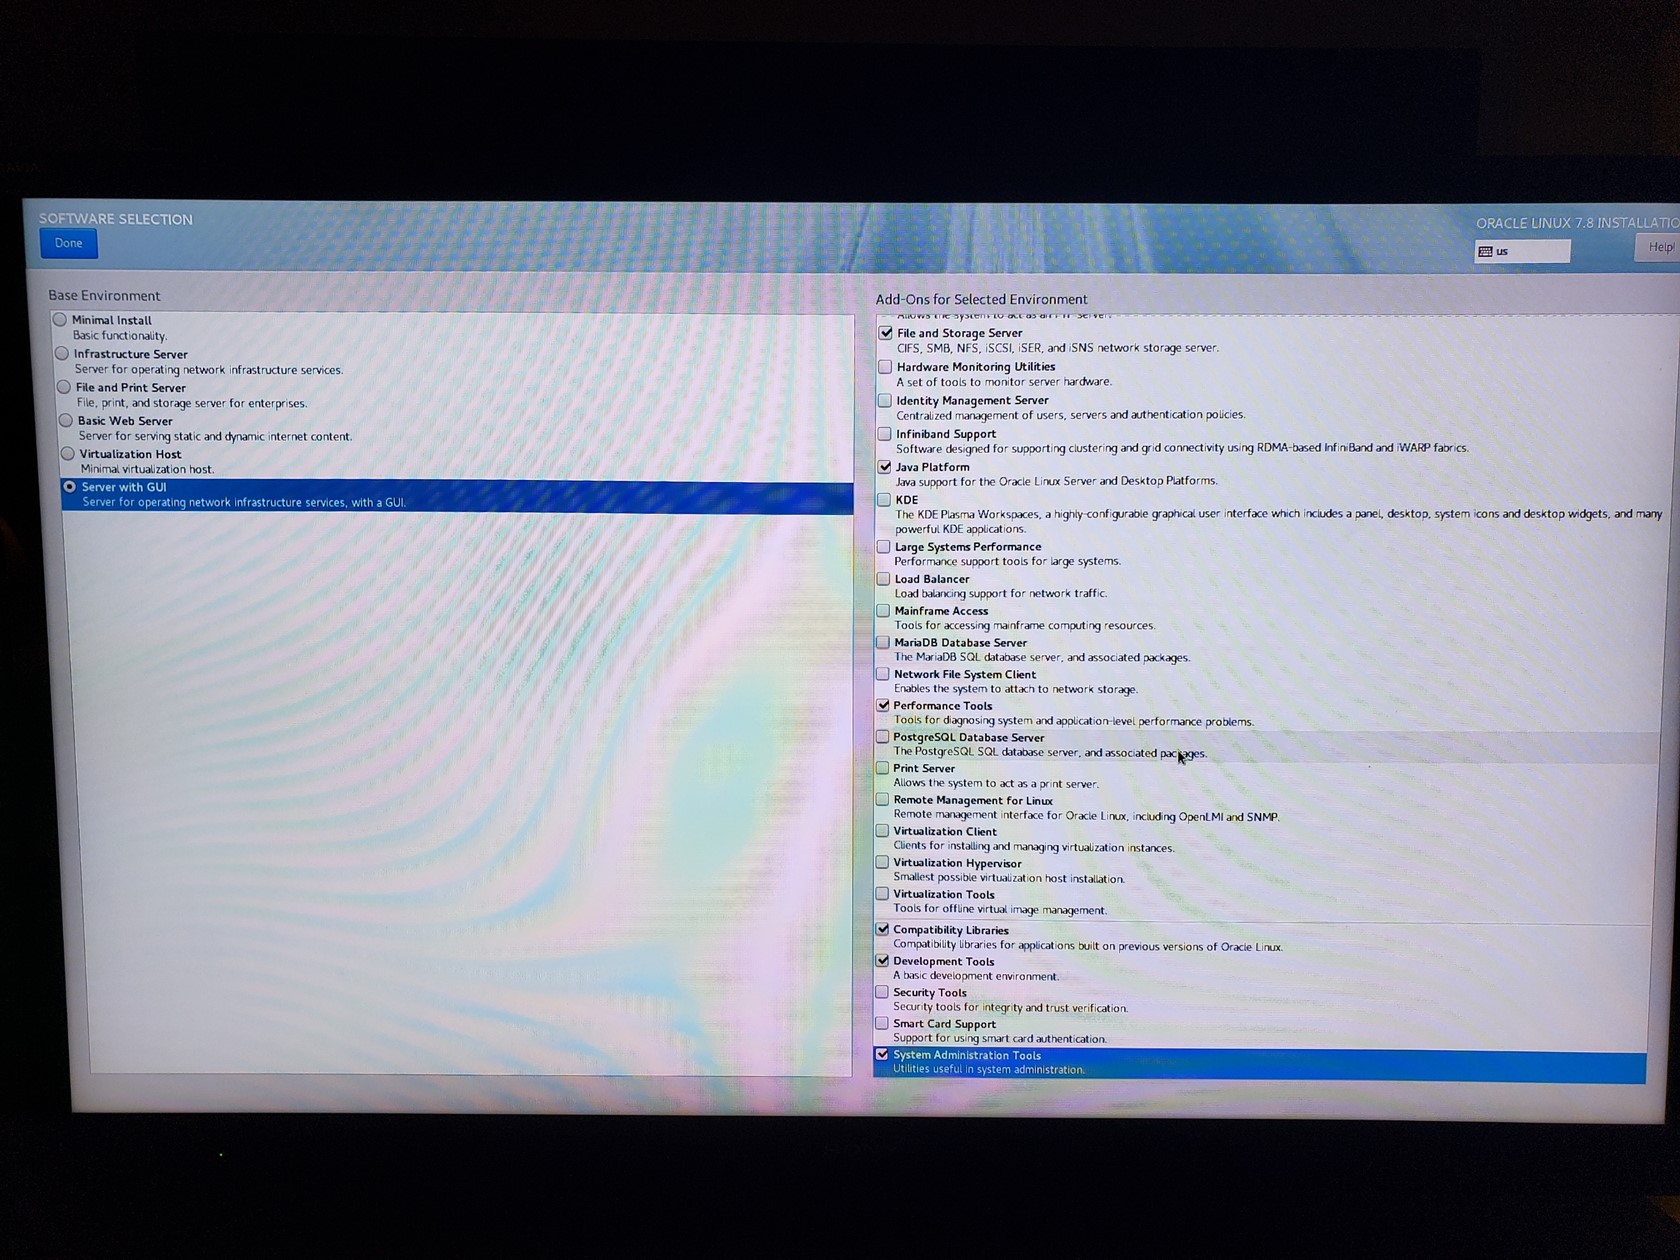
Boot from USB stick and Install
If you set up the bios correctly, then it should see the USB stick first on boot up.
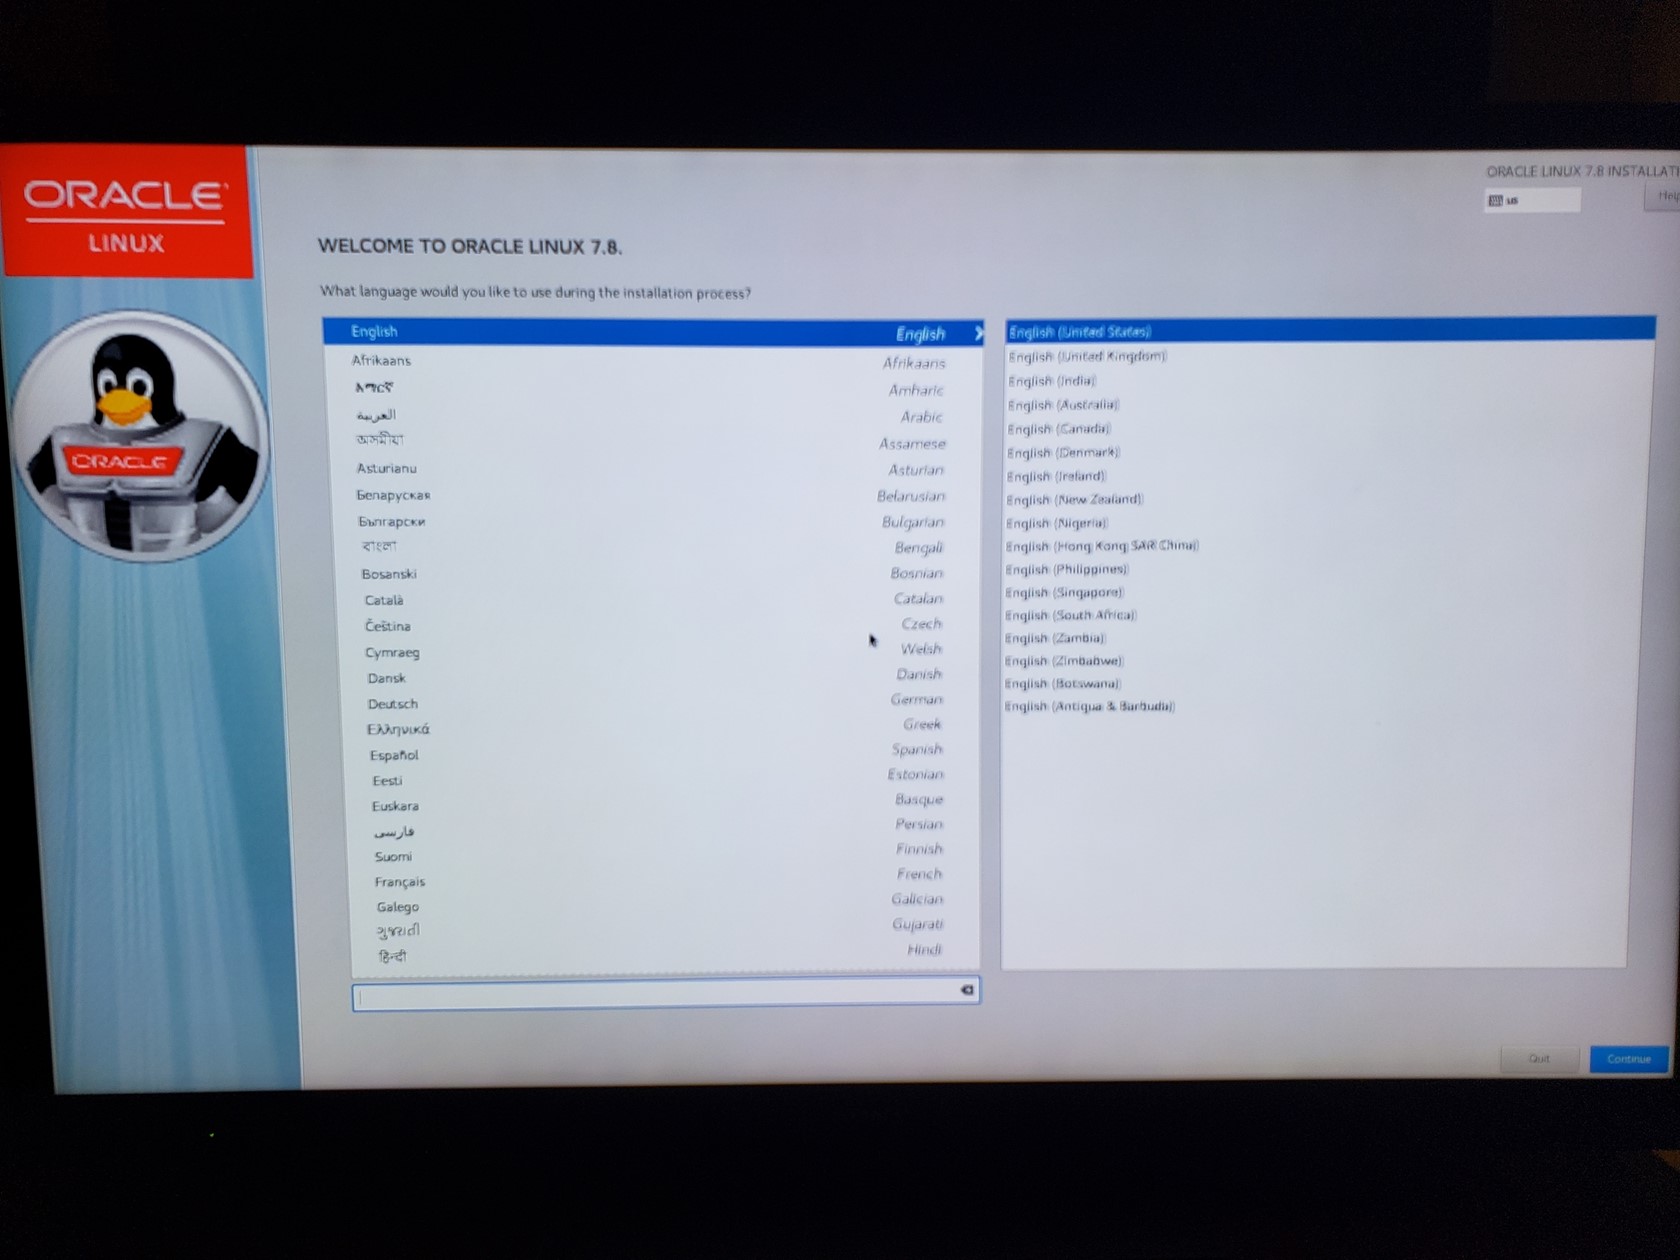
I picked Server with GUI as I want gnome desktop. I also added some optional products as shown on the right.
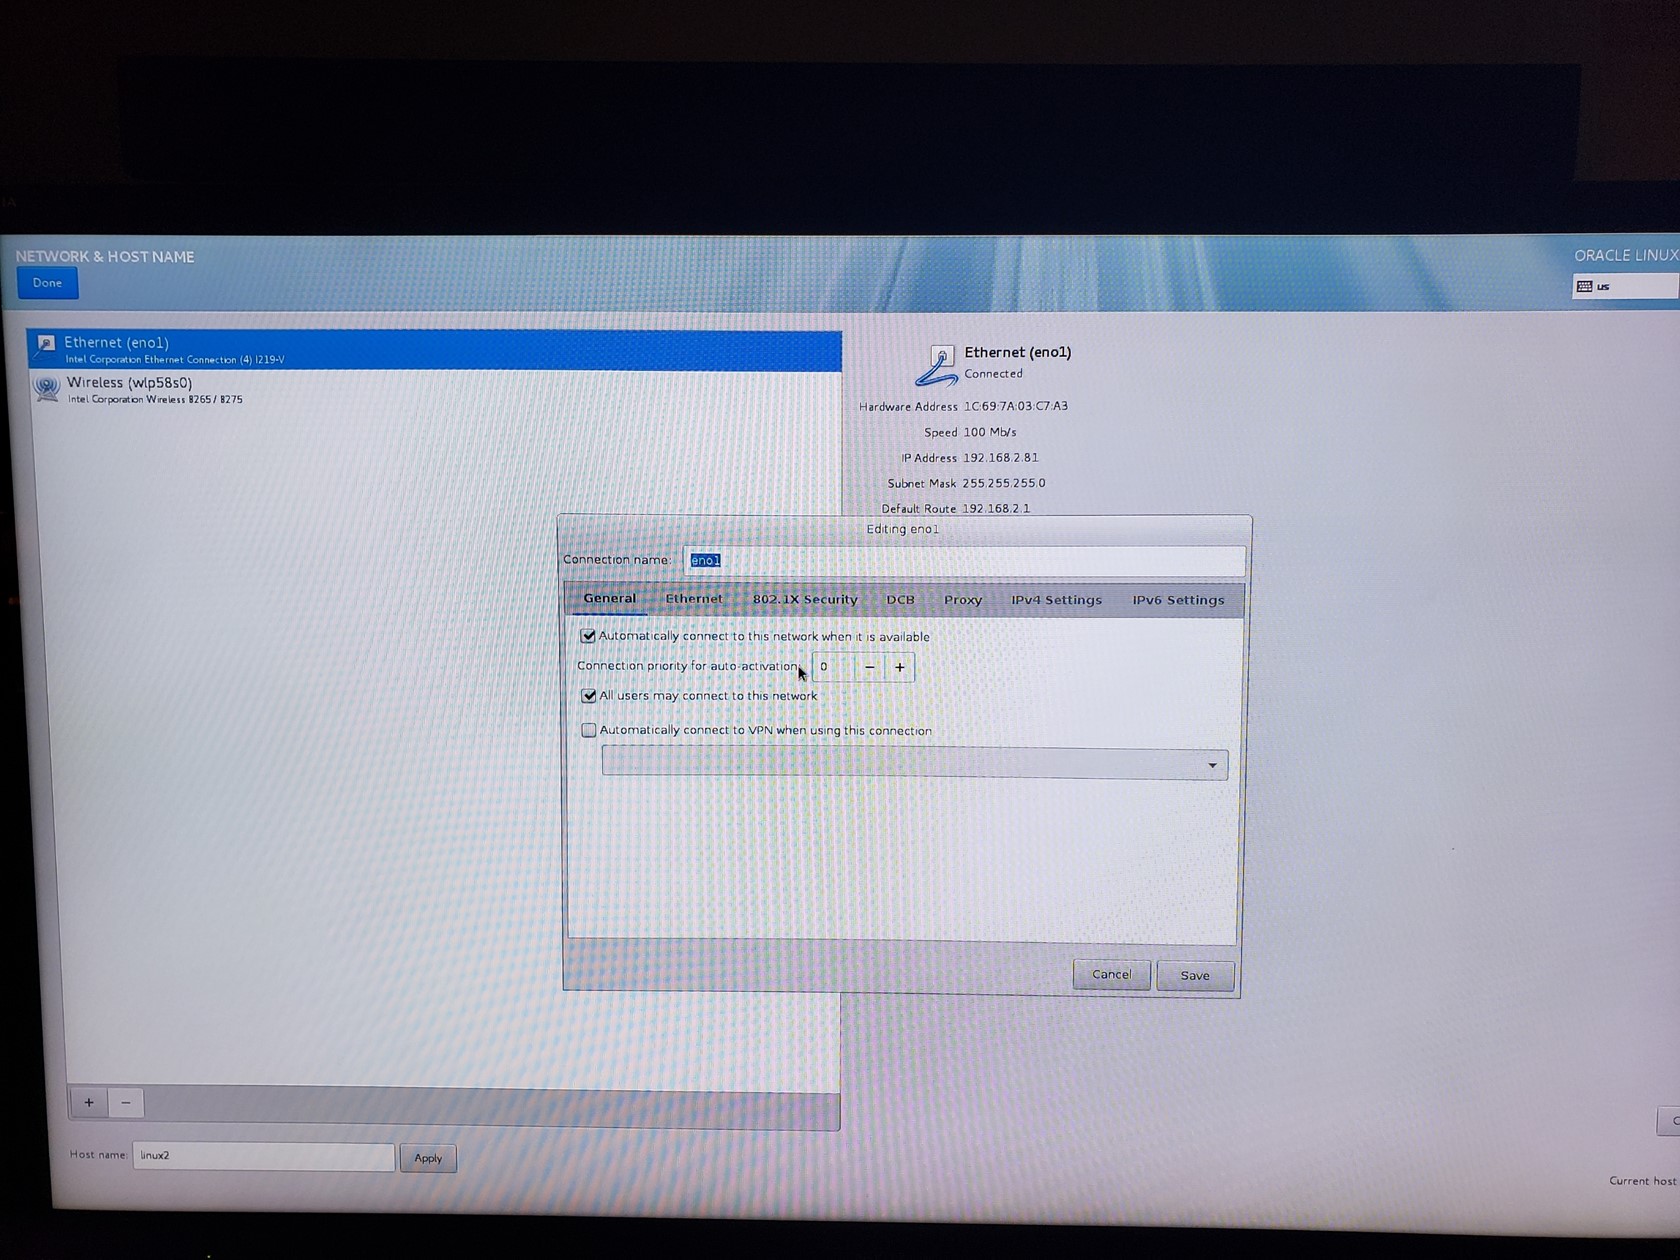
ENO1 network port
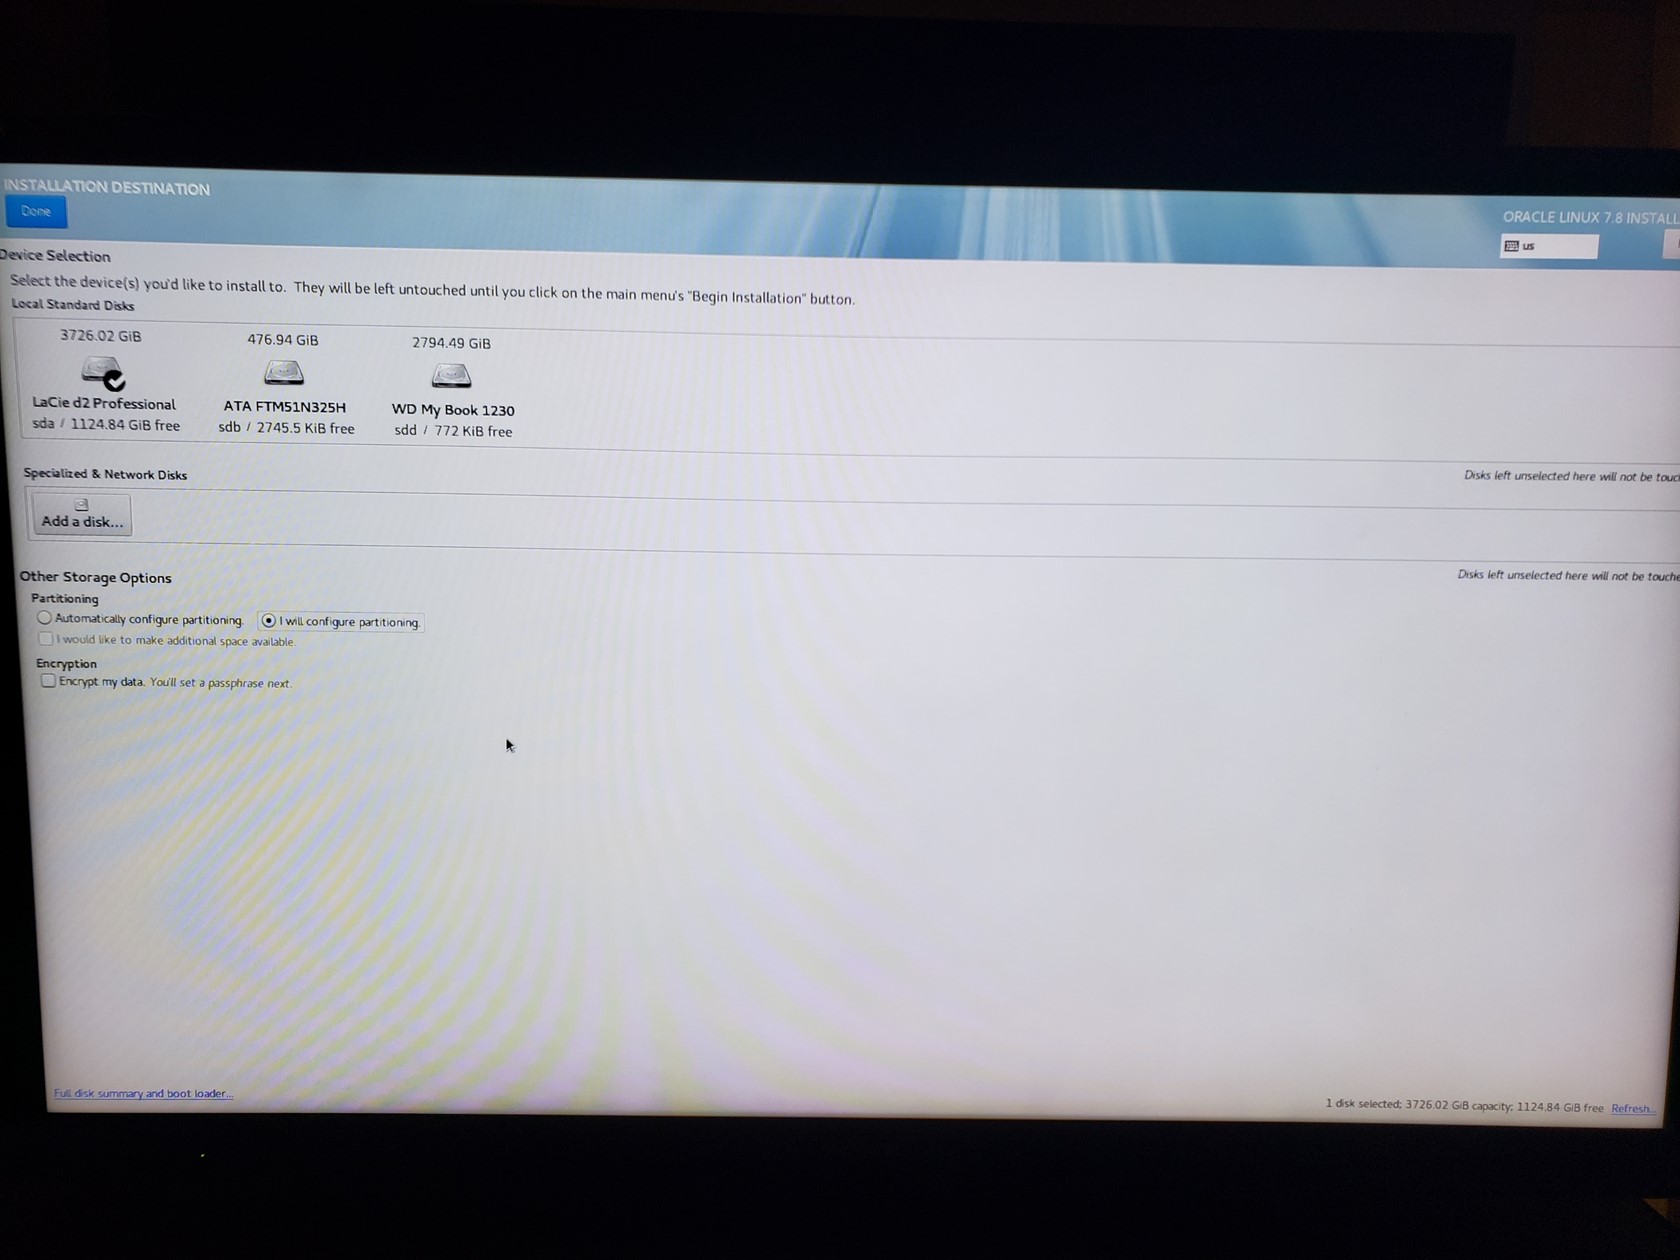
Allocating Disk Partitions
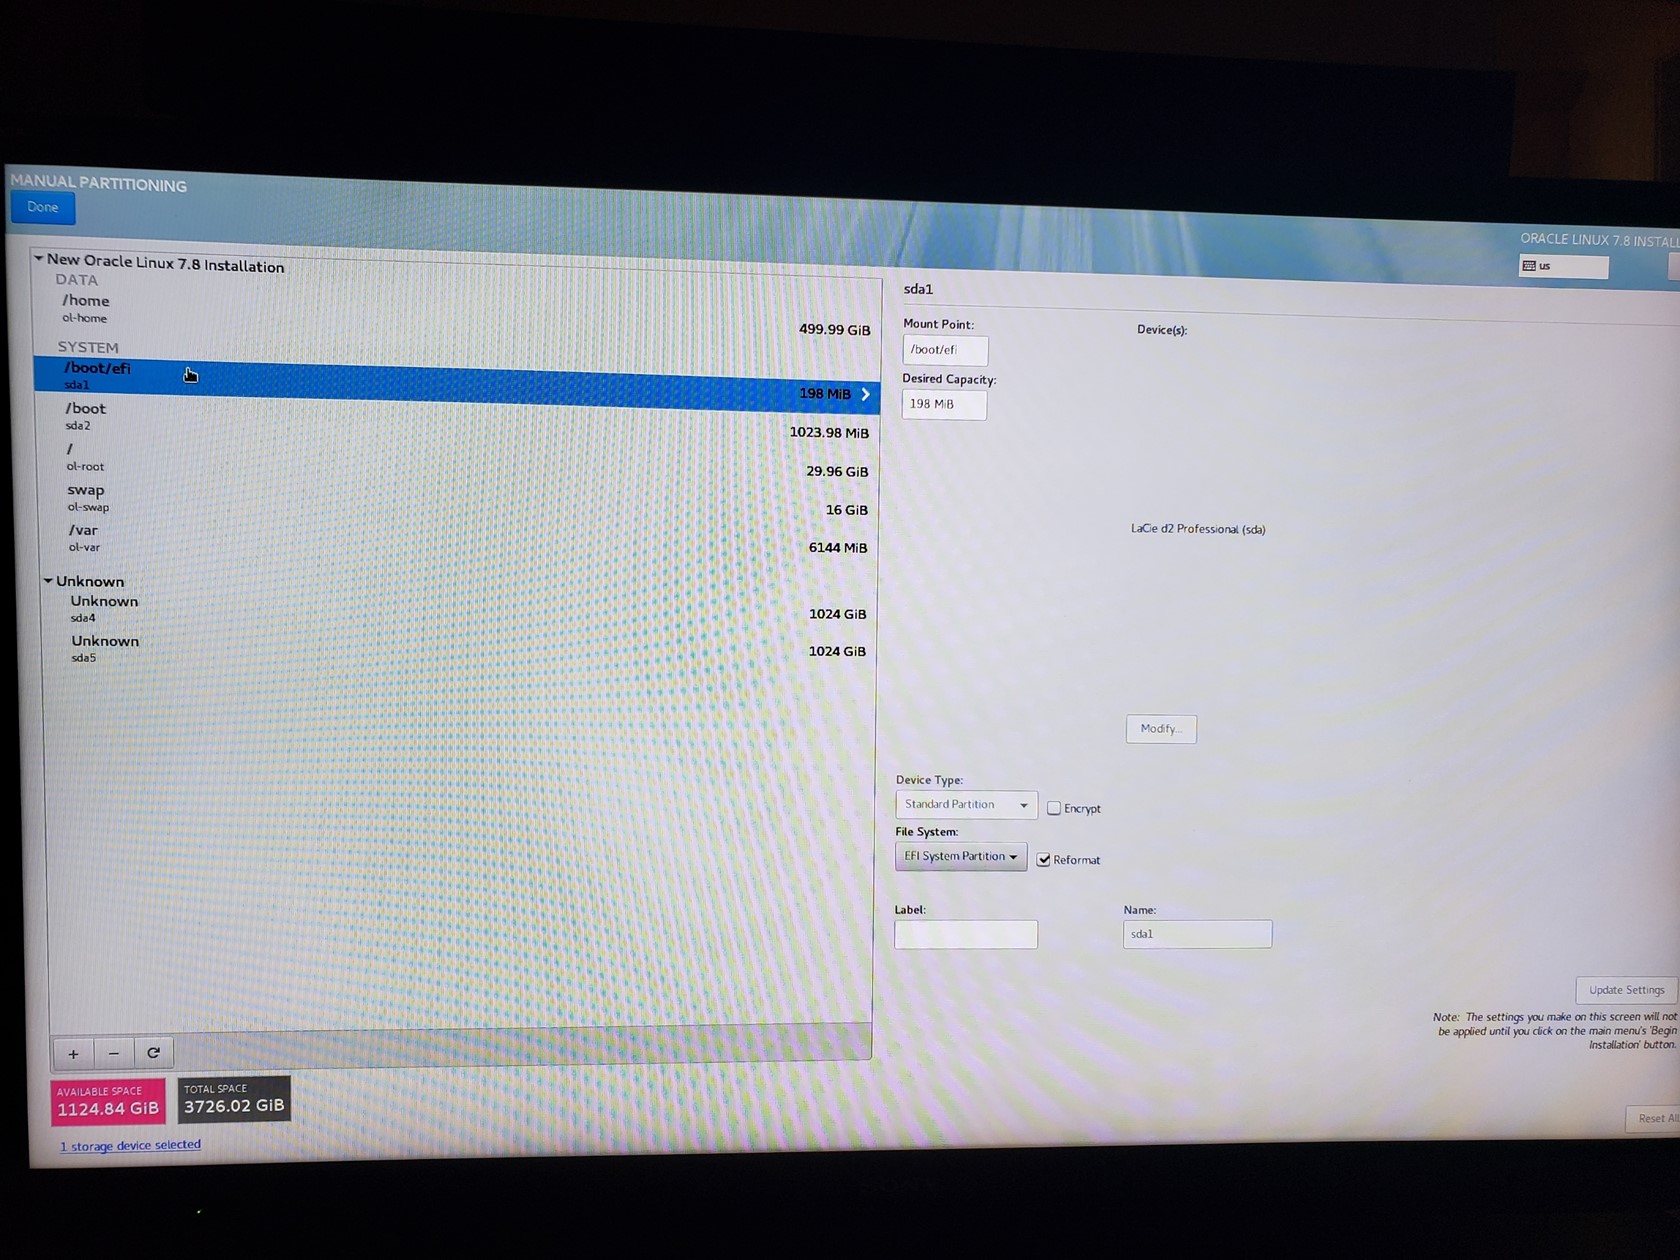
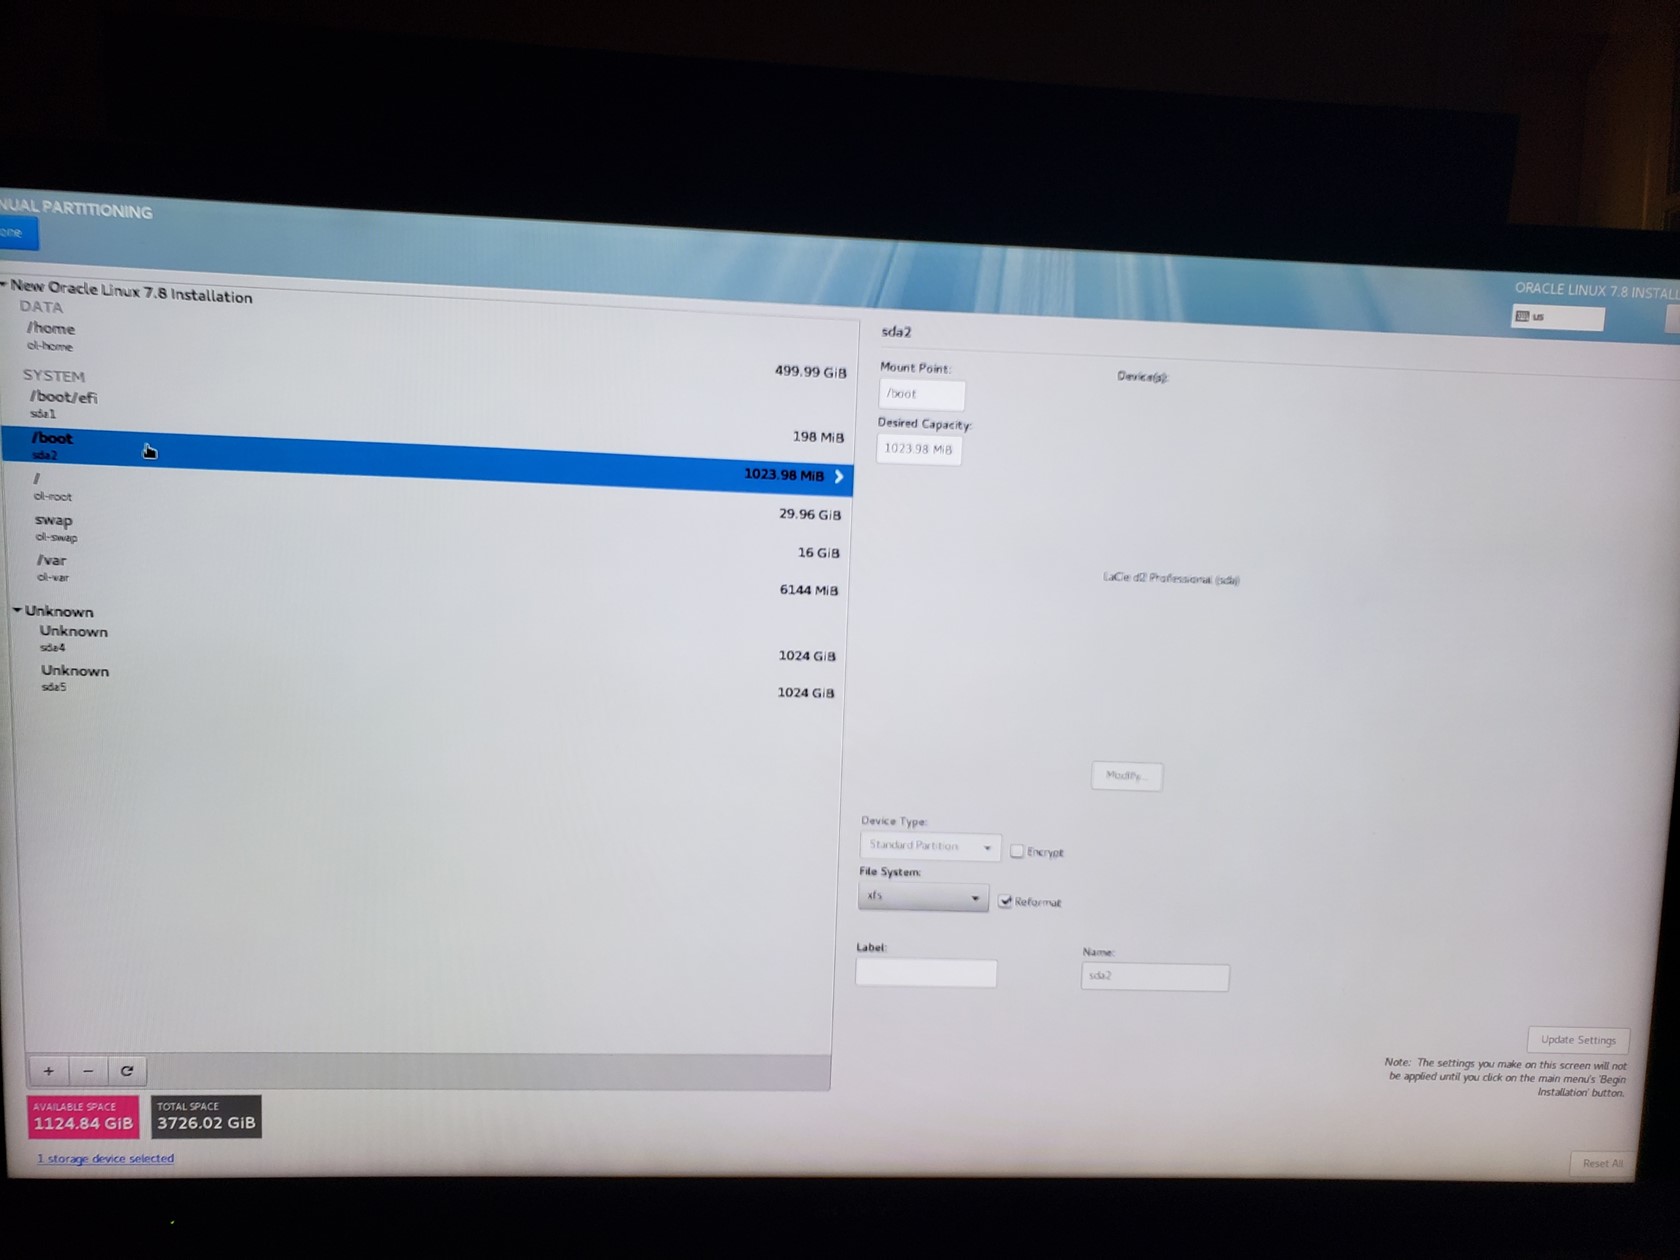
As mentioned above I had already created the partitions I wanted. You can do it here too. There are plenty of resources you can find about using the installer to do it. Here I’m just assigning the mount points to each partition and to the LVM.
Note that the /boot/efi partition is standard type EFI format, and /boot is standard type XFS format.
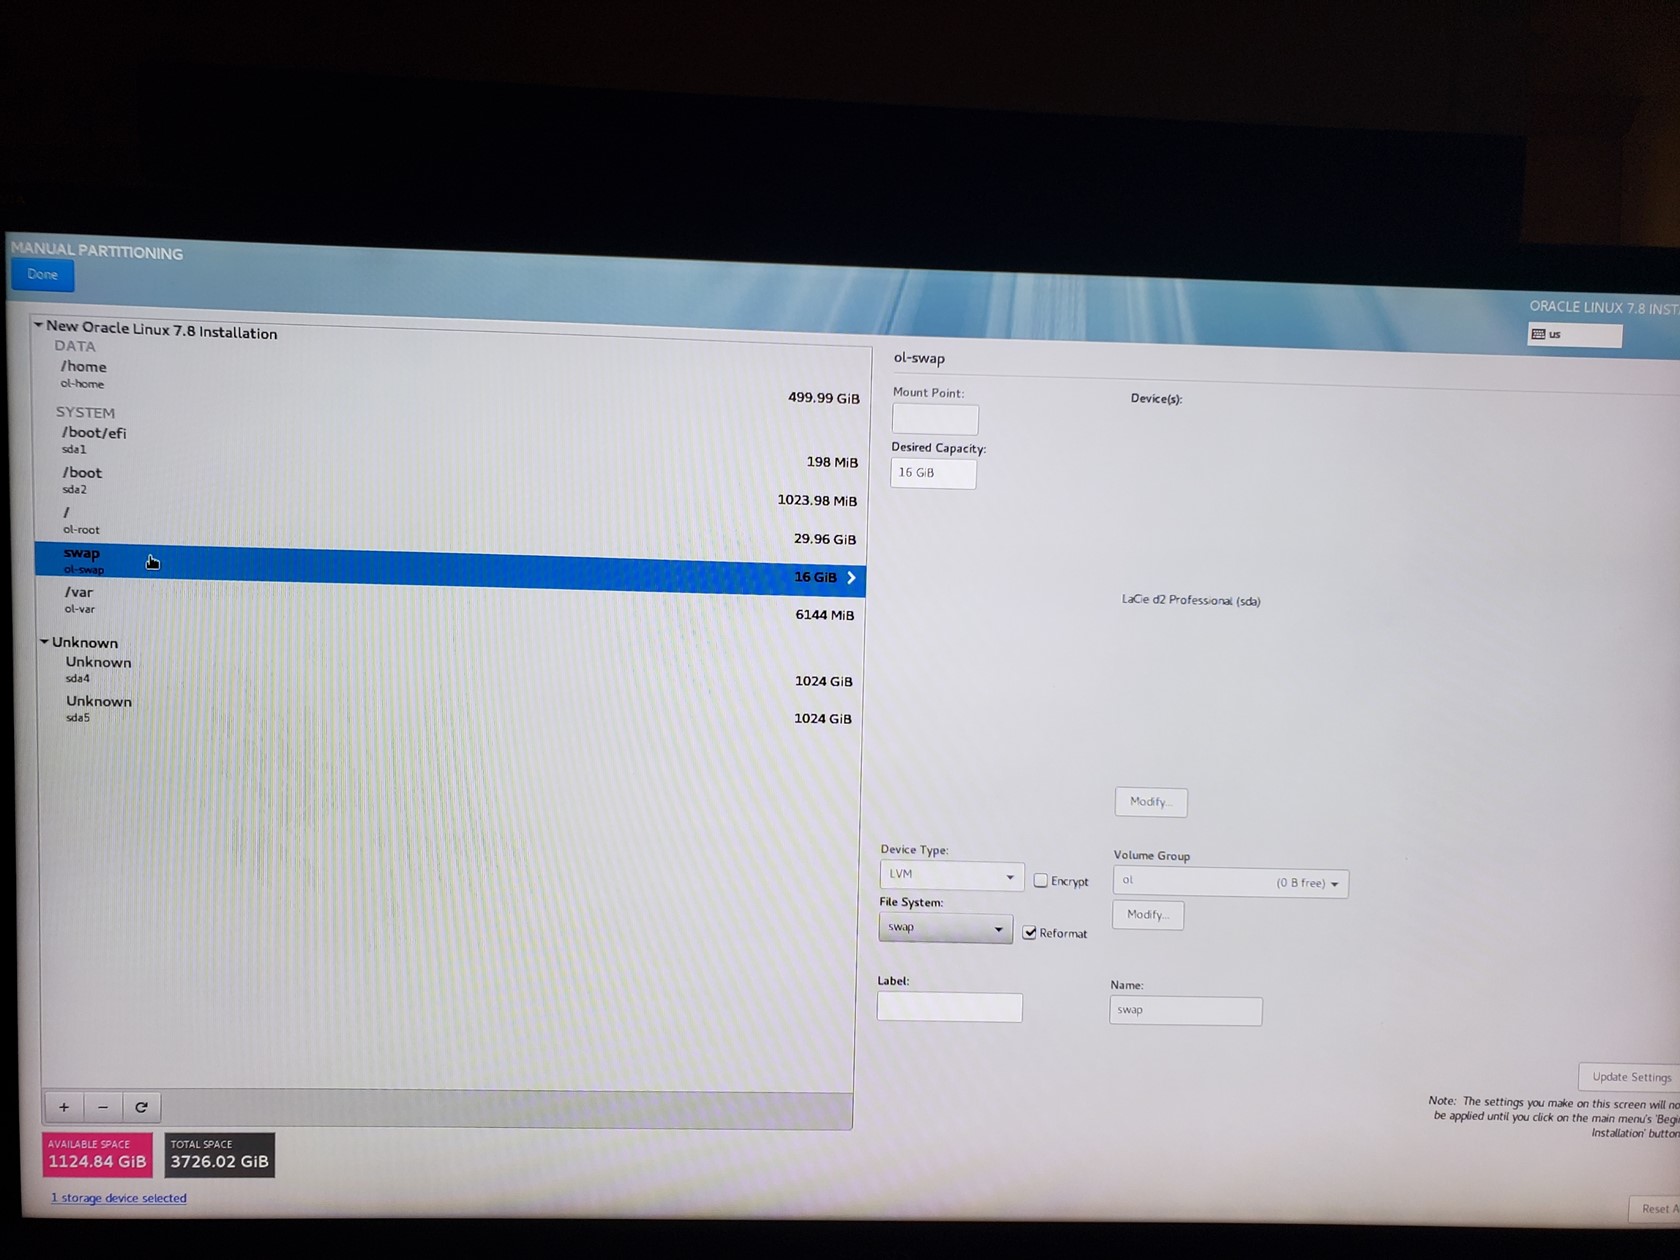
Swap is, well, swap format but is on the LVM partition. I made it twice the size of my 8GB of memory. Seems to be debatable how big it should be but 16GB is trivial.
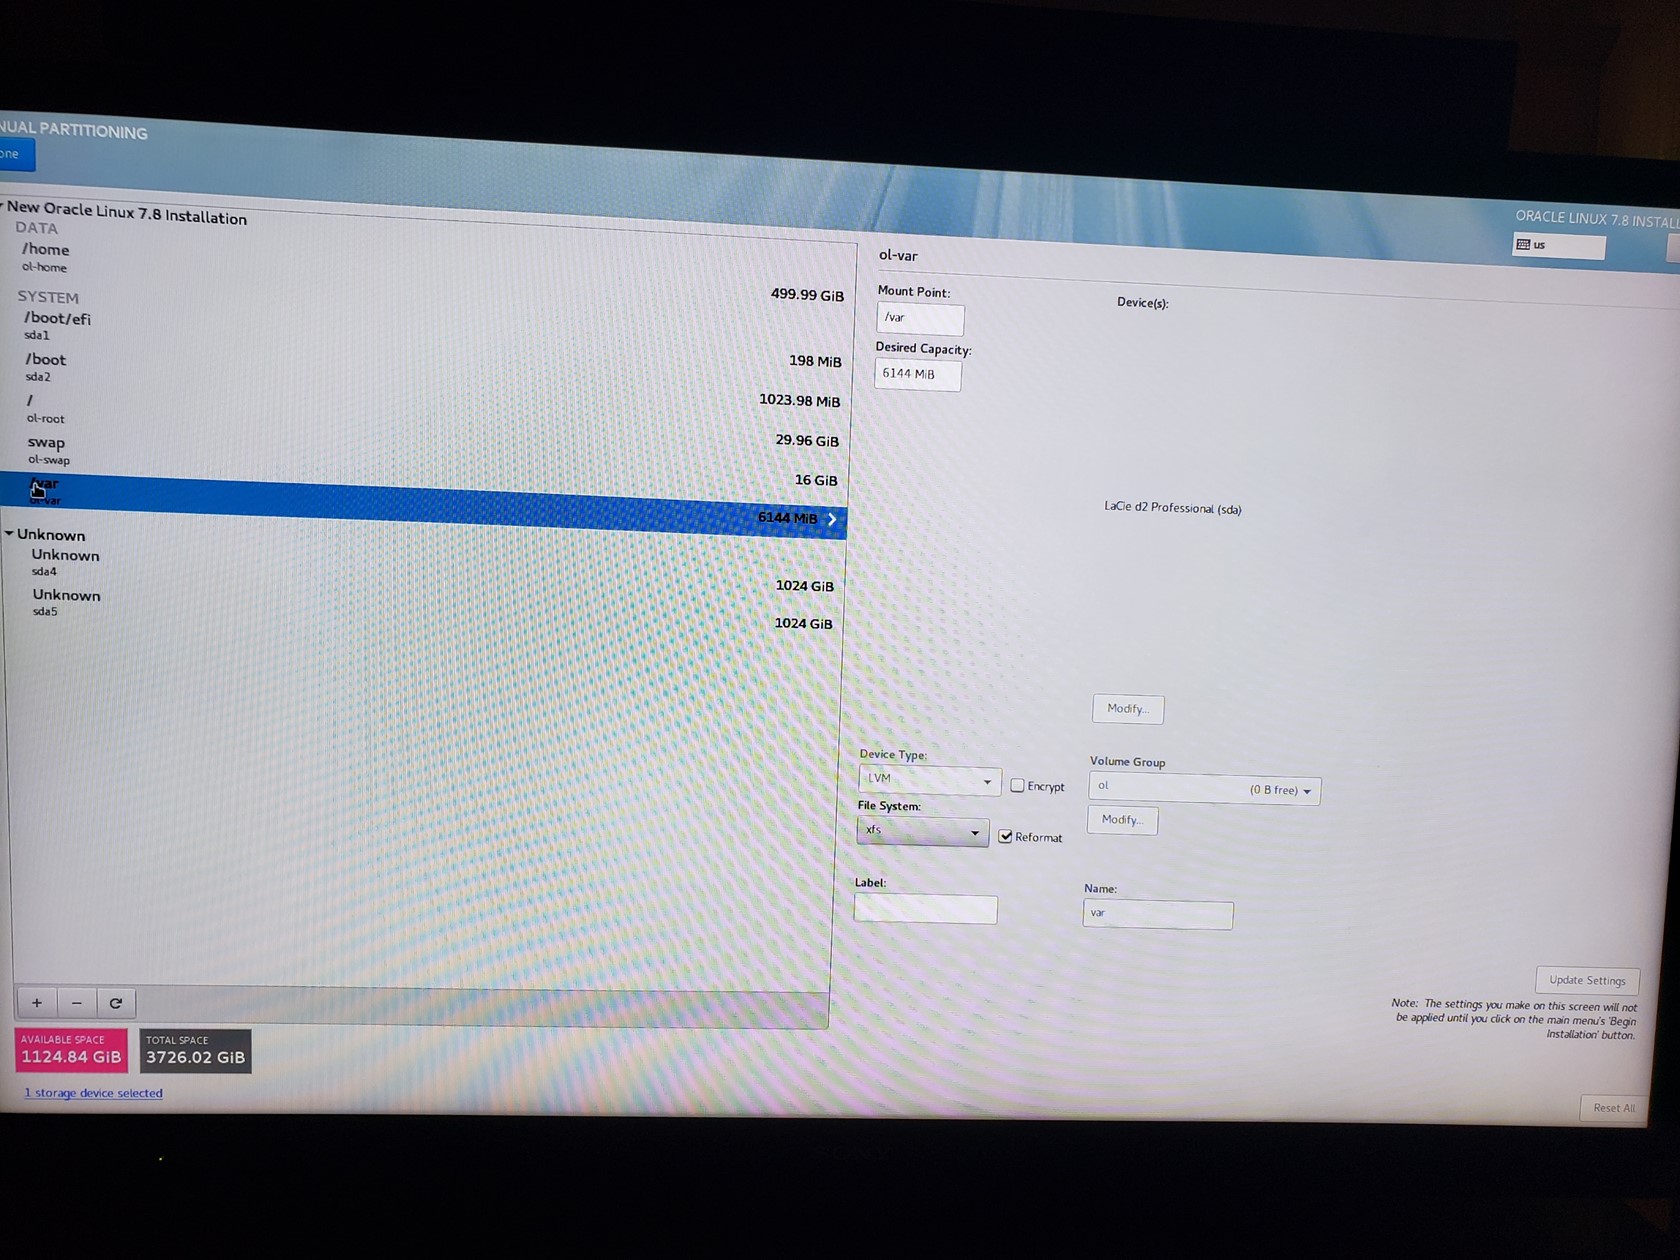
The rest go on the LVM partition along with swap and are XFS. I probably overallocated / at 30GB, but I’m putting the /u01 directory there for the Oracle binaries and anything else I install. I’m slightly paranoid about running out of root space from past experience. Your mileage may vary. /home is 500GB because I have it available and sometimes you just need somewhere to put stuff.

Finish the Install
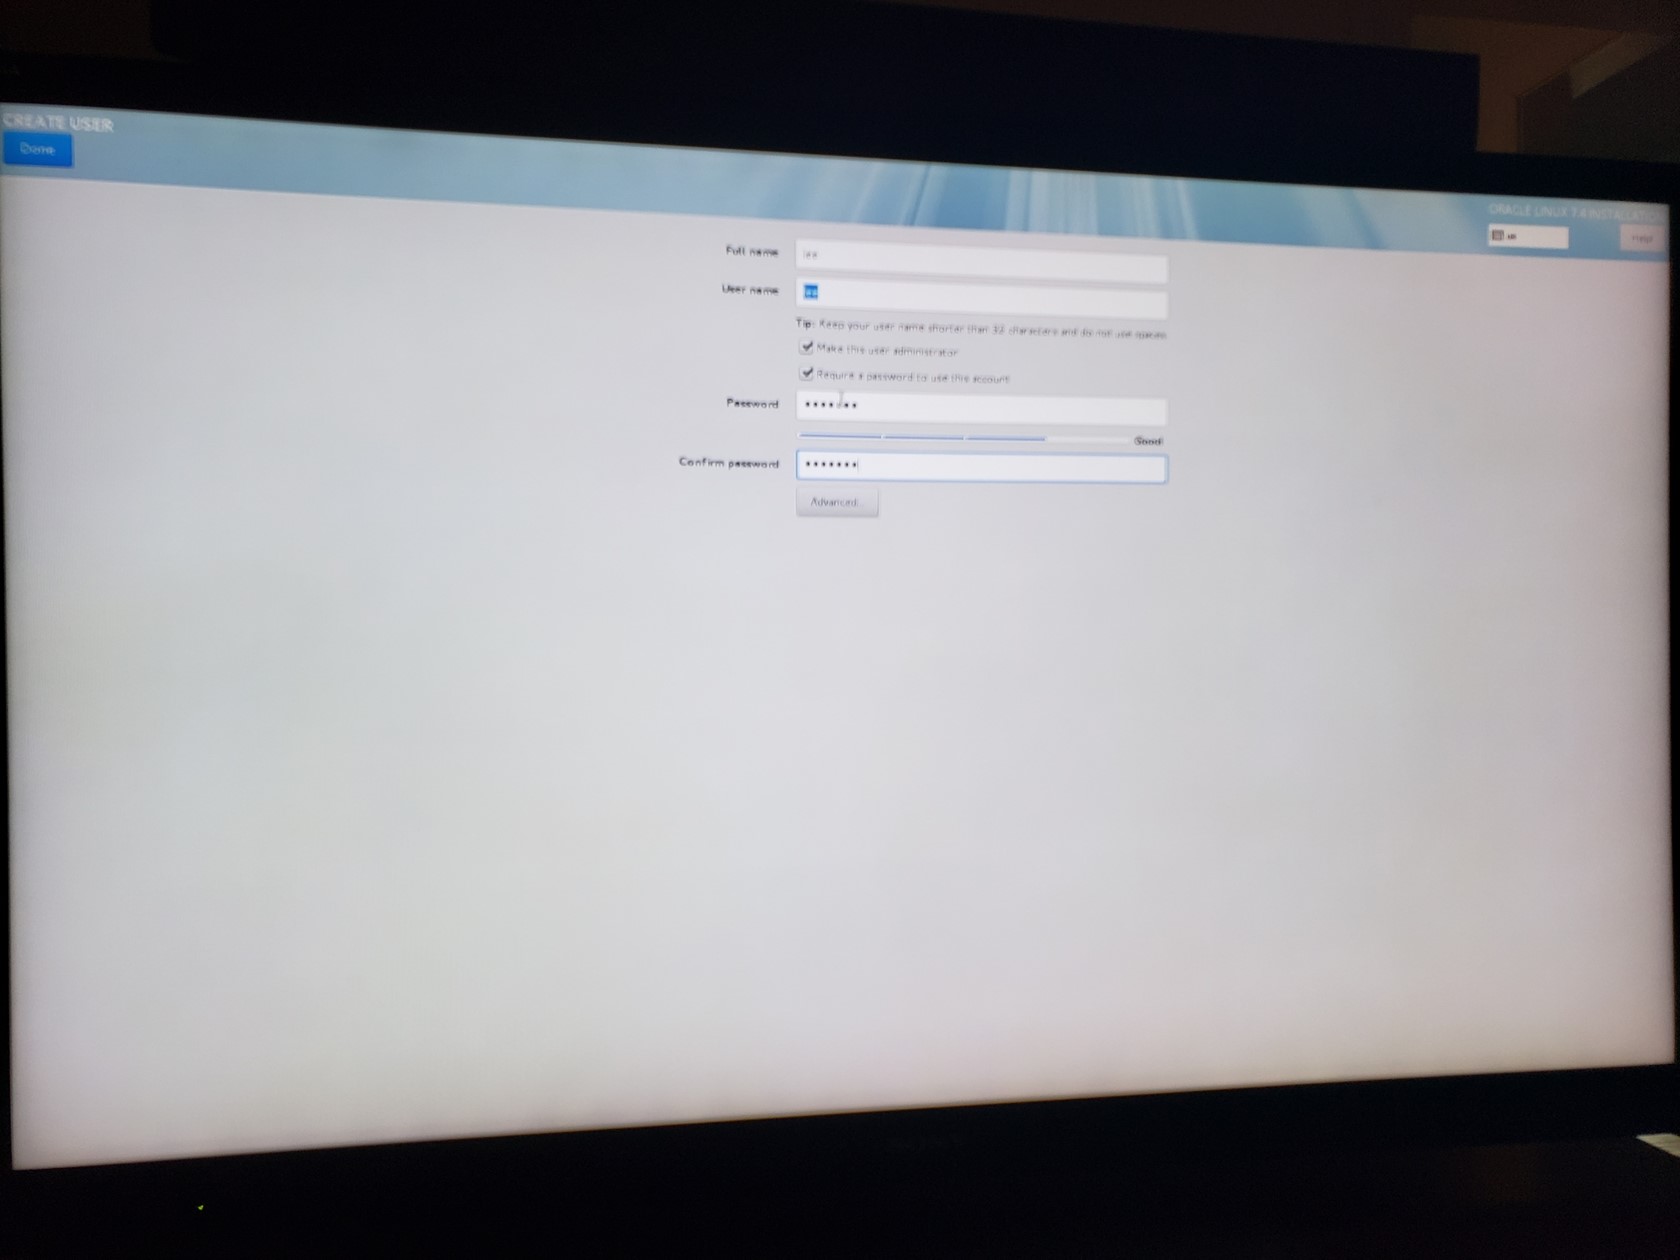
I gave myself an administrator account I can “sudo” from.
Then let the install rip.
When it finishes and wants to reboot, select that and give it a moment to shut down before pulling the USB stick. If you do it too soon, the shutdown hangs. If you it too late, it comes up on the installer boot image again. Either way just turn the machine off at that point. Pull the USB and it should boot to “grub” which will have the Unbreakable Linux kernel first in the boot list, with the RHL kernel next, a recovery image, and then the Windows image. You can rearrange the order later with “grubby” or directly in the grub config file. There are plenty of resources about that.
Remember the way I’ve done this, if I pull the plug out on the Lacie driver, the original boot loader on the internal drive should be picked up. This is as safe as it can be as long as I don’t ever do anything to that original internal Windows drive.
I booted from the unbreakable linux kernel and came up in gnome desktop, logged in as myself, then went to the Applications menu on the top left to get a gnonme-terminal and did:
sudo su -
Now I’m ready to rock.
Software Updates
From gnome desktop ran Applications/System Tools/Software Updates. Eventually it came up with 59 updates. Installed them. Rebooted.
xterm
sudo su -
yum -y install xterm # Now I can start X on another machine, ssh into this one and launch an xterm
# could use gnome-terminal but I'm old school.
Add EPEL repository
Put the following lines in /etc/yum.repos.d/epel-yum-ol7.repo
\[ol7\_epel\] name=Oracle Linux $releasever EPEL ($basearch)
baseurl=http://yum.oracle.com/repo/OracleLinux/OL7/developer\_EPEL/$basearch/
gpgkey=file:///etc/pki/rpm-gpg/RPM-GPG-KEY-oracle
gpgcheck=1
enabled=1

\[root@linux2 ~\]# yum repolist
Loaded plugins: langpacks, ulninfo
ol7\_epel | 2.7 kB 00:00:00
(1/3): ol7\_epel/x86\_64/updateinfo | 6.1 kB 00:00:00
(2/3): ol7\_epel/x86\_64/group | 365 kB 00:00:02
(3/3): ol7\_epel/x86\_64/primary\_db | 17 MB 00:01:01
repo id repo name status
ol7\_UEKR4/x86\_64 Latest Unbreakable Enterprise Kernel Release 4 for Oracle Linux 7Server (x86\_64) 96
ol7\_epel/x86\_64 Oracle Linux 7Server EPEL (x86\_64) 31,547
ol7\_latest/x86\_64 Oracle Linux 7Server Latest (x86\_64) 18,516
repolist: 50,159
ntfs-3g
\[root@linux2 ~\]# yum -y install ntfs-3g
...
Complete!
At this point the File Manager/Media Manager could mount the NTFS filesystem from the 3TB USB disk drive named “My Drive” on /media/run/*my login id*/something… A “df” command showed me the device was /dev/sdc1. There are other ways to find the device. In any case I dismounted that automatic drive using file manager and put the following entry into /etc/fstab:
/dev/sdc1 /mnt/g ntfs-3g context="system\_u:object\_r:samba\_share\_t:s0",defaults,uid=nobody,gid=nobody 0 0
The context stuff may be required for samba, but that could have been a side effect of my experiment with security profiles. In any case it didn’t hurt anything, and with Secure Linux environment stuff you have to have that attribute for samba to share it. Also notice I’m mapping the username/groupname of all files on this drive as “nobody”. The default is “root” which is messy. Remember I am going to make this a public share.
Now create the mount point and mount it:
\[root@linux2 ~\]# mkdir /mnt/g
\[root@linux2 ~\]# mount /mnt/g
\[root@linux2 ~\]# ls -ld /mnt/g
drwxrwxrwx. 1 nobody nobody 20480 May 5 11:47 /mnt/g
\[root@linux2 ~\]#
samba
This reference was helpful: https://oracle-base.com/articles/linux/linux-samba-configuration
\[root@linux2 lee\]# yum -y install samba
Loaded plugins: langpacks, ulninfo
Package samba-4.10.4-10.el7.x86\_64 already installed and latest version
Nothing to do
\[root@linux2 lee\]# service smb start
Redirecting to /bin/systemctl start smb.service
\[root@linux2 lee\]# chkconfig smb on
Note: Forwarding request to 'systemctl enable smb.service'.
Created symlink from /etc/systemd/system/multi-user.target.wants/smb.service to /usr/lib/systemd/system/smb.service.
\[root@linux2 lee\]#
Next/ I put the following in /etc/samba/smb.conf:
\[global\]
workgroup = WORKGROUP
netbios name = linux2
security = user
server string = Samba Server %v
map to guest = bad user

\[g\]
path = /mnt/g
writable = yes
browsable = yes
guest ok = yes
# guest account = lee
# guest only = yes
public = yes
read only = no
create mask = 0775
directory mask = 0664

\[root@linux2 lee\]# service smb restart
Redirecting to /bin/systemctl restart smb.service
But it still doesn’t work. The reason is the Linux firewall.
Firewall
I’m going to add the samba ports, but while I’m here I’ll also add Remote Dekstop Protocol ports for the step that follows samba. You’ll need to set your DISPLAY to point to your X server. If you are on gnome desktop, set it to :0.0. But in a window with your login shell or before doing switch user to root, remember to do xhost + so that the root shell can open the display.
\[root@linux2 lee\]# export DISPLAY=192.168.2.162:0.0
\[root@linux2 lee\]# firewall-config
This brings up a gui for configuring the firewall on Linux. I selected eno1, which is my hardwired network interface, and hit the “Change Zone” button. I changed it from “public” to “home”. Next I added the samba services to home as shown:
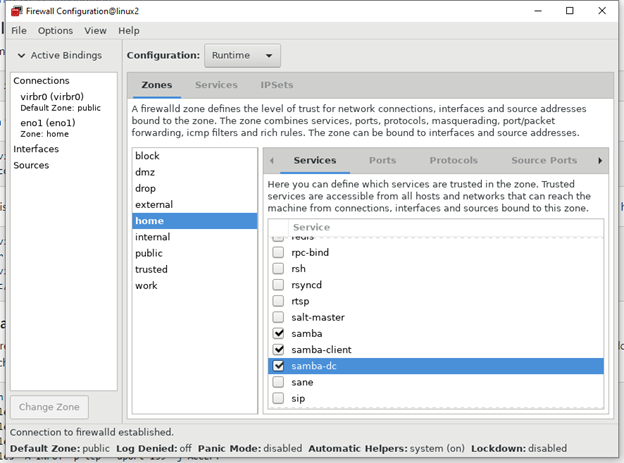
Notice that was Runtime Configuration. Under Options menu choose “Runtime to Permanent” to save those changes. I also want to add “rdp” protocol so I can add xrdp and get the gnome desktop to my windows machine using Remote Desktop. To do that we have to add the ports which requires editing the Permanent config.
Change the Configuration: dropdown from Run time to Permanent and go to the Services tab. Hit the “+” at bottom:
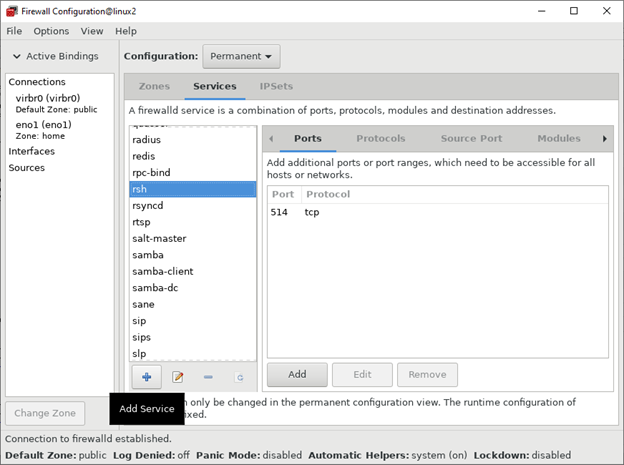
Add “rdp” and click OK. Then select rdp from the list and click the Add button under Ports:
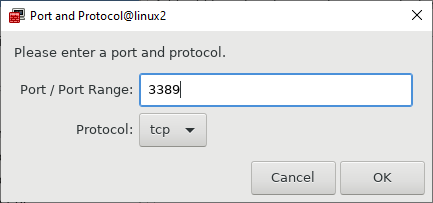
Also add same port with “udp”.
Select Zones tab. Select “home”. Add the new “rdp” service to home. Note that this is in the Permanent configuration. We will have to restart the service to pick it up. Under options select Reload Firewalld. After that you should be able to select rdp for the home zone. Now do options/Reload Firewalld again and you should see rdp checked for home zone.
It shouldn’t be needed, but you can restart the daemon to be sure it will come up next time:
\[root@linux2 lee\]# service firewalld stop
Redirecting to /bin/systemctl stop firewalld.service
\[root@linux2 lee\]# service firewalld start
Redirecting to /bin/systemctl start firewalld.service
I fired firewall-config back up and now I see that under the “home” profile the new “rdp” service is allowed.
At this point samba is running and exposing my “/mnt/g” NTFS drive as the “g” share. The files on linux are owned by user “nobody”. It’s all read/write and my wife doesn’t yell at me any more about her pictures. It doesn’t matter if I’m booting windows or linux. In both cases using \\ip-address\g mounts the same drive!!!!!!!!!!!!!!!!
It is not secure you say. Hey. Ask me if I care.
Xrdp
I want to use Windows Remote Desktop client to get the gnome desktop on my PC so I’m not sitting in front of the TV to use it. Now that we have the EPEL repository configured, this is not that hard. Well, it was hard until I figured out the firewall issue that we addressed in the prior step, but now it is not hard.
\[root@linux2 lee\]# yum -y install xrdp tigervnc-server
Loaded plugins: langpacks, ulninfo
Resolving Dependencies
--> Running transaction check
---> Package tigervnc-server.x86\_64 0:1.8.0-19.0.1.el7 will be installed
---> Package xrdp.x86\_64 1:0.9.5-1.el7 will be installed
--> Processing Dependency: xorgxrdp for package: 1:xrdp-0.9.5-1.el7.x86\_64
--> Running transaction check
---> Package xorgxrdp.x86\_64 0:0.2.11-1.0.1.el7 will be installed
--> Finished Dependency Resolution Dependencies Resolved
========================================================================================================================================
Package Arch Version Repository Size
========================================================================================================================================
Installing:
tigervnc-server x86\_64 1.8.0-19.0.1.el7 ol7\_latest 216 k
xrdp x86\_64 1:0.9.5-1.el7 ol7\_epel 412 k
Installing for dependencies:
xorgxrdp x86\_64 0.2.11-1.0.1.el7 ol7\_epel 63 k

Transaction Summary
========================================================================================================================================
Install 2 Packages (+1 Dependent package)

Total download size: 691 k
Installed size: 2.7 M
Downloading packages:
(1/3): xorgxrdp-0.2.11-1.0.1.el7.x86\_64.rpm | 63 kB 00:00:02
(2/3): tigervnc-server-1.8.0-19.0.1.el7.x86\_64.rpm | 216 kB 00:00:03
(3/3): xrdp-0.9.5-1.el7.x86\_64.rpm | 412 kB 00:00:03
----------------------------------------------------------------------------------------------------------------------------------------
Total 178 kB/s | 691 kB 00:00:03
Running transaction check
Running transaction test
Transaction test succeeded
Running transaction
Installing : xorgxrdp-0.2.11-1.0.1.el7.x86\_64 1/3
Installing : 1:xrdp-0.9.5-1.el7.x86\_64 2/3
Installing : tigervnc-server-1.8.0-19.0.1.el7.x86\_64 3/3
Verifying : tigervnc-server-1.8.0-19.0.1.el7.x86\_64 1/3
Verifying : xorgxrdp-0.2.11-1.0.1.el7.x86\_64 2/3
Verifying : 1:xrdp-0.9.5-1.el7.x86\_64 3/3

Installed:
tigervnc-server.x86\_64 0:1.8.0-19.0.1.el7 xrdp.x86\_64 1:0.9.5-1.el7

Dependency Installed:
xorgxrdp.x86\_64 0:0.2.11-1.0.1.el7

Complete!
\[root@linux2 lee\]# systemctl start xrdp
\[root@linux2 lee\]# netstat -antup |grep xrdp
tcp 0 0 0.0.0.0:3389 0.0.0.0:\* LISTEN 9515/xrdp
tcp 0 0 127.0.0.1:3350 0.0.0.0:\* LISTEN 9514/xrdp-sesman
\[root@linux2 lee\]# systemctl enable xrdp
Created symlink from /etc/systemd/system/multi-user.target.wants/xrdp.service to /usr/lib/systemd/system/xrdp.service.
\[root@linux2 lee\]#
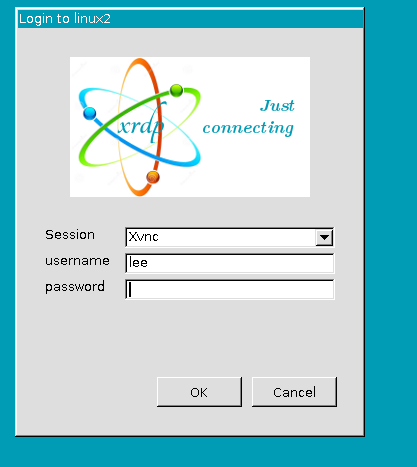
Now from my laptop I run Windows Remote Desktop client entering the IP address of the Linux server (I’ll get around to naming service later) and it works!!!
We may get a secondary authentication request to enter the password for “keyring”. I am living with that for now.
We also get multiple authentication requests to create a color profile. Pffft. Google search turns up this:
https://unix.stackexchange.com/questions/417906/authentication-is-required-to-create-a-color-profile.
The answer that worked for me was to put the following in the file: /etc/polkit-1/localauthority/50-local.d/color.pkla
\[Allow colord for all users\]
Identity=unix-user:\*
Action=org.freedesktop.color-manager.create-device;org.freedesktop.color-manager.create-profile;org.freedesktop.color-manager.delete-device;org.freedesktop.color-manager.delete-profile;org.freedesktop.color-manager.modify-device;org.freedesktop.color-manager.modify-profile
ResultAny=yes
ResultInactive=yes
ResultActive=yes
Now when I use Windows Remote Desktop I do not get a secondary prompt for a password (except sometimes for keyring). I have a remote desktop that looks just like the main gnome screen on the actual computer. I can still run an X windows server locally on my laptop and set the DISPLAY variable to have applications come that way, but most of the time just using the rdp connection desktop window works fine.
oracle-database-preinstall-19c-1.0-1.el7.x86_64.rpm
I have this file on the /mnt/g driver I was just mentioning. I suspect there is a way to get it with yum, but I already have it.
\# yum -y localinstall oracle-database-preinstall-19c-1.0-1.el7.x86\_64.rpm
It completed without issues. One of the things it did was create the “oracle” user account and most of the groups listed in the documentation; however, I’m going to install the grid software standalone per the 19c recommendation and so will be walking through that document adding the grid user and any missing groups.
\# yum update -y
Per this link https://oracle-base.com/articles/19c/oracle-db-19c-installation-on-oracle-linux-7, I ran through the following yum install commands. Some of them were not already present, but many were.
yum install -y bc
yum install -y binutils
yum install -y compat-libcap1
yum install -y compat-libstdc++-33
#yum install -y dtrace-modules
#yum install -y dtrace-modules-headers
#yum install -y dtrace-modules-provider-headers
yum install -y dtrace-utils
yum install -y elfutils-libelf
yum install -y elfutils-libelf-devel
yum install -y fontconfig-devel
yum install -y glibc
yum install -y glibc-devel
yum install -y ksh
yum install -y libaio
yum install -y libaio-devel
yum install -y libdtrace-ctf-devel
yum install -y libXrender
yum install -y libXrender-devel
yum install -y libX11
yum install -y libXau
yum install -y libXi
yum install -y libXtst
yum install -y libgcc
yum install -y librdmacm-devel
yum install -y libstdc++
yum install -y libstdc++-devel
yum install -y libxcb
yum install -y make
yum install -y net-tools # Clusterware
yum install -y nfs-utils # ACFS
yum install -y python # ACFS
yum install -y python-configshell # ACFS
yum install -y python-rtslib # ACFS
yum install -y python-six # ACFS
yum install -y targetcli # ACFS
yum install -y smartmontools
yum install -y sysstat
yum install -y unixODBC
The Oracle Base document also recommends adding a password to the “oracle” account (and I presume “grid” account), setting secure Linux to permissive and stopping the firewall. Since these things are not discussed in the main documentation, I’m unsure about them. I’m going to skip and come back to them if I run into trouble that might be due to them.
Google Chrome
Although Firefox is fine, it has some quirks. Sometimes I would rather have Google Chrome. Installing it turned out to be ridiculously difficult, but I finally stumbled through some posts with enough information to figure it out.
\[root@linux2 Downloads\]# wget https://dl.google.com/linux/direct/google-chrome-stable\_current\_x86\_64.rpm
\[root@linux2 Downloads\]# wget http://mirror.centos.org/centos/7/os/x86\_64/Packages/vulkan-filesystem-1.1.97.0-1.el7.noarch.rpm
\[root@linux2 Downloads\]# wget http://mirror.centos.org/centos/7/os/x86\_64/Packages/vulkan-1.1.97.0-1.el7.x86\_64.rpm
\[root@linux2 Downloads\]# yum -y install libappindicator-gtk3-12.10.0-13.el7.x86\_64
\[root@linux2 Downloads\]# yum -y install redhat-lsb libXScrnSaver
\[root@linux2 Downloads\]# yum -y install liberation-fonts-1.07.2-16.el7.noarch
\[root@linux2 Downloads\]# yum install -y liberation-narrow-fonts-1.07.2-16.el7.noarch
\[root@linux2 Downloads\]# yum -y install vulkan-filesystem-1.1.97.0-1.el7.noarch.rpm
\[root@linux2 Downloads\]# yum install -y vulkan-1.1.97.0-1.el7.x86\_64.rpm
\[root@linux2 Downloads\]# yum install -y google-chrome-stable\_current\_x86\_64.rpm
Installing Oracle Grid
Going through the checklist starting with section 2 (Checking and Configuring Server Hardware for Oracle Database). https://docs.oracle.com/en/database/oracle/oracle-database/19/ladbi/checking-server-hardware-and-memory-configuration.html#GUID-DC04ABB6-1822-444A-AB1B-8C306079439C
I have no issues.
We already did the preinstall rpm.
I do not have a support subscription, so skip Ksplice.
We need to install cvuqdisk, but it is in the grid package. We need to unzip that package. Before we can do that we need to create the “grid” user and some more groups that were not created automatically by the preinstall rpm. Then we can install the cvuqdisk rpm from there. We will come back to this.
The transparent huge page setting was taken care of for us I presume by the preinstall rpm:
\[root@linux2 yum.repos.d\]# cat /sys/kernel/mm/transparent\_hugepage/enabled
always madvise \[never\]
My disk has the correct scheduler for ASM:
\[root@linux2 yum.repos.d\]# cat /sys/block/sda/queue/scheduler
noop \[deadline\] cfq
Create users and groups for grid
\[root@linux2 ~\]# /usr/sbin/groupadd -g 54327 asmdba
\[root@linux2 ~\]# /usr/sbin/groupadd -g 54328 asmoper
\[root@linux2 ~\]# /usr/sbin/groupadd -g 54329 asmadmin
The rest of the groups already exist from the preinstall rpm.
\[root@linux2 ~\]# /usr/sbin/useradd -u 54331 -g oinstall -G dba,asmdba,backupdba,dgdba,kmdba,racdba,asmoper,asmadmin grid
Although the “oracle” user already exists, edit /etc/group and add “oracle” to the list of users for the group “asmdba” or you can use “usermod” command as below.
\[root@linux2 ~\]# usermod -a -G asmdba oracle
For the users “grid” and “oracle” edit the .bash_profile and add the following two lines:
\[root@linux2 ~\]# vim ~grid/.bash\_profile ~oracle/.bash\_profile 2 files to edit

umask 022
export ORACLE\_HOSTNAME=$(hostname)
Add the following lines to /etc/security/limits.conf:
oracle hard nofile 65536
oracle soft stack 10240
oracle hard stack 32768
grid hard nofile 65536
grid soft stack 10240
grid hard stack 32768
Exit from the user grid/oracle and do “sudo su - grid” again to check the limits:
\[grid@linux2 ~\]$ ulimit -Sn
1024
\[grid@linux2 ~\]$ ulimit -Hn
65536
\[grid@linux2 ~\]$ ulimit -Su
4096
\[grid@linux2 ~\]$ ulimit -Hu
61856
\[grid@linux2 ~\]$ ulimit -Ss
10240
\[grid@linux2 ~\]$ ulimit -Hs
32768
Copying grid install software
Create a directory for data files. Not sure we will use this and it is in the / partition, so we will see. Later I’m going to create a recovery area in /home.
\[root@linux2 ~\]# mkdir -p /u01/oradata
\[root@linux2 ~\]# chown grid:oinstall /u01/oradata
\[root@linux2 ~\]# chmod 775 /u01/oradata
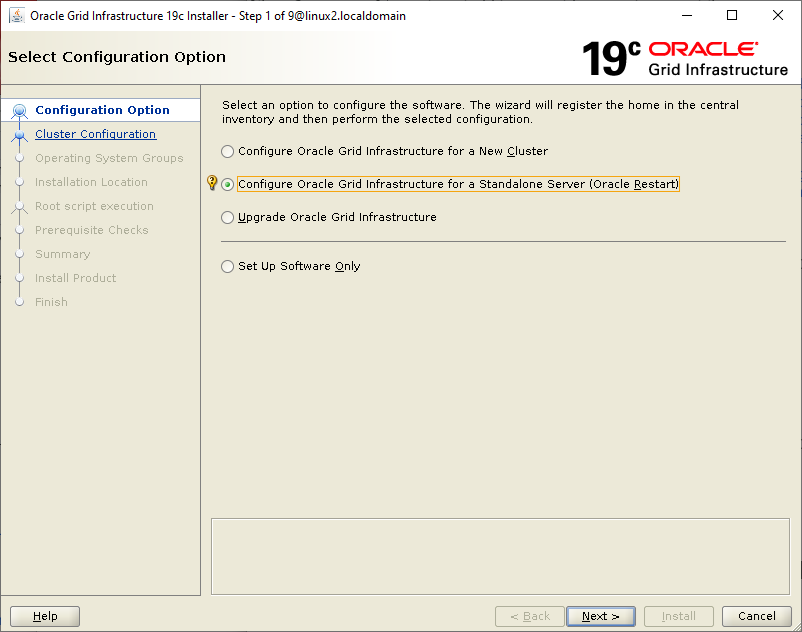
I’m following section 10 “Installing Oracle Grid Infrastructure for a Standalone Server with a New Database Installation:
\[root@linux2 ~\]# mkdir -p /u01/app/oracle
\[root@linux2 ~\]# mkdir -p /u01/app/oraInventory
\[root@linux2 ~\]# chown -R oracle:oinstall /u01/app/oracle
\[root@linux2 ~\]# chown -R grid:oinstall /u01/app/oraInventory
\[root@linux2 ~\]# chmod -R 775 /u01/app
Note that the instructions say to do this as user “oracle”, but I’m going to be using user “grid”. I still want all of the directories above “grid” to be owned by “oracle”. I have my Oracle grid zip file on /mnt/g/lee. Yours will be somewhere else.
\[root@linux2 oracle\]# mkdir -p /u01/app/oracle/product/19.0.0/grid
\[root@linux2 oracle\]# chmod -R 775 /u01/app/oracle/product
\[root@linux2 oracle\]# chown -R oracle:oinstall /u01/app/oracle/product
\[root@linux2 oracle\]# chown grid:oinstall /u01/app/oracle/product/19.0.0/grid
\[root@linux2 bin\]# mkdir /u01/app/grid
\[root@linux2 bin\]# chmod 775 /u01/app/grid
\[root@linux2 bin\]# chown grid:oinstall /u01/app/grid
Now switch over to user grid.
\[grid@linux2 ~\]$ cd /u01/app/oracle/product/19.0.0/grid
\[grid@linux2 grid\]$ unzip -q /mnt/g/lee/LINUX.X64\_193000\_grid\_home.zip
Now that we have the zip file unpacked we can go back to the step where we need the cvq rpm and install that as user “root”:
\[root@linux2 rpm\]# cd /u01/app/oracle/product/19.0.0/grid/cv/rpm
\[root@linux2 rpm\]# CVUQDISK\_GRP=oinstall; export CVUQDISK\_GRP
\[root@linux2 rpm\]# rpm -iv cvuqdisk-1.0.10-1.rpm
Preparing packages...
cvuqdisk-1.0.10-1.x86\_64
Configure asm disks with grid
This is done as “root”. Note that if you wind up needing to reinstall after this step (like if you run deinstall/deinstall), you may need to run a command to wipe out the disk header (dd if=/dev/zero of=/dev/sda4 bs=1024 count=100). Be very careful!!!!! But if you just follow the grid deinstall instructions without wiping out the header, and then try again, it won’t find the partitions.
Something I’m not sure about, but I had trouble otherwise, is to use “udev” to configure the ownership of the device files for my disk partitions. I see hints that suggest ASM should be taking care of this, but I just don’t know. I’m creating the following file:
\[root@linux2 ~\]# vim /etc/udev/rules.d/99-oracleasm.rules

KERNEL=="sda4", SUBSYSTEM=="block", OWNER="grid", GROUP="oinstall", MODE="0660"
KERNEL=="sda5", SUBSYSTEM=="block", OWNER="grid", GROUP="oinstall", MODE="0660"
Then run the following command to verify the rule:
\# udevadm test $(udevadm info --query=path --name=sda4)
Then to reload the rules and trigger them:
\[root@linux2 ~\]# udevadm control --reload-rules
\[root@linux2 ~\]# udevadm trigger
\[root@linux2 ~\]# ls -lal /dev/sda\*
brw-rw----. 1 root disk 8, 0 May 7 23:53 /dev/sda
brw-rw----. 1 root disk 8, 1 May 7 23:53 /dev/sda1
brw-rw----. 1 root disk 8, 2 May 7 23:53 /dev/sda2
brw-rw----. 1 root disk 8, 3 May 7 23:53 /dev/sda3
brw-rw----. 1 grid oinstall 8, 4 May 7 23:53 /dev/sda4
brw-rw----. 1 grid oinstall 8, 5 May 7 23:53 /dev/sda5
That will hold up across reboots.
Now to label the partitions. We are back to using root.
\[root@linux2 rpm\]# export ORACLE\_HOME=/u01/app/oracle/product/19.0.0/grid
\[root@linux2 rpm\]# export ORACLE\_BASE=/tmp
\[root@linux2 rpm\]# cd /u01/app/oracle/product/19.0.0/grid/bin
\[root@linux2 bin\]# fdisk -l # to find the partition name of my ASM allocation
##### CAREFUL!!!!
\[root@linux2 bin\]# ./asmcmd afd\_label DATA1 /dev/sda4 --init
\[root@linux2 bin\]# ./asmcmd afd\_label DATA2 /dev/sda5 --init
\[root@linux2 bin\]# ./asmcmd afd\_lslbl /dev/sda4
--------------------------------------------------------------------------------
Label Duplicate Path
================================================================================
DATA1 /dev/sda4
\[root@linux2 bin\]# ./asmcmd afd\_lslbl /dev/sda5
--------------------------------------------------------------------------------
Label Duplicate Path
================================================================================
DATA2 /dev/sda5
\[root@linux2 bin\]#
Now we switch to user “grid” (sudo su - grid). Recall that we already updated the profile setting environment as directed. If you get a message
_ERROR: Unable to verify the graphical display setup. This application requires X display. Make sure that xdpyinfo exist under PATH variable_
then you have two choices. You can run “xhost +” in a terminal of your original login user to allow X11 clients run by other users to connect to your gnome desktop (which I’m displaying via remote desktop protocol on my laptop), or you can set the DISPLAY variable to point to your local Xserver where you have done “xhost +” or started without authentication. Either way we need to set the DISPLAY variable. I echo the DISPLAY variable in a terminal window I launched from gnome and see “:11.0”. I’ll use that.
\[grid@linux2 grid\]$ pwd /u01/app/oracle/product/19.0.0/grid
\[grid@linux2 grid\]$ export DISPLAY=:11.0
\[grid@linux2 grid\]$ ./gridSetup.sh
Oops! The grid installer does not display correctly in my remote desktop client. Drats! It is probably an xresource or colormap thing or something. I don’t feel the urge to try to figure that out right now. OK, plan B. I run my local VcXsrv X11 server on my PC which I started with the “Disable access control” checked. Now I set my DISPLAY variable to point there and try again:
\[grid@linux2 grid\]$ export DISPLAY=192.168.2.162:0.0
\[grid@linux2 grid\]$ ./gridSetup.sh
This takes a little while to prepare and give you the next screen. You can look in the /tmp directory and below for logs if you get worried. I found mine in /tmp/GridSetupActions2020-05-07_08-37-33AM/gridSetupActions2020-05-07_08-37-33AM.out.
I’m doing a standalone Server (Oracle Restart).
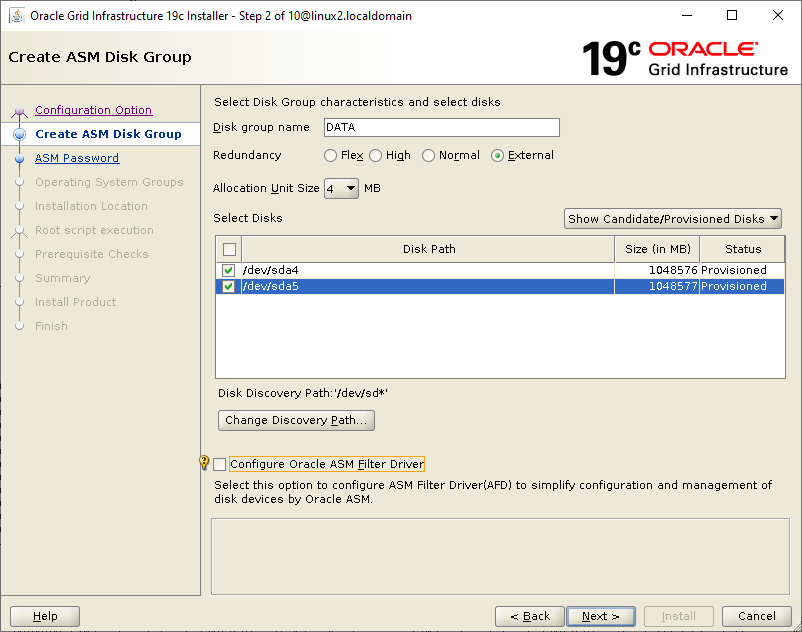
It eventually gives me this window showing the partitions I labeled with asmcmd. I’m chosing “External” redundancy because I have no need of mirroring on this setup (and no separate disk to put it on). I select my disks. I was going to try to use ASM Filter Driver, but with two partitions instead of one (or perhaps something else I did since I last tried it), it tells me it is not supported. Based on other posts I’ve seen, it looked like trouble anyway.
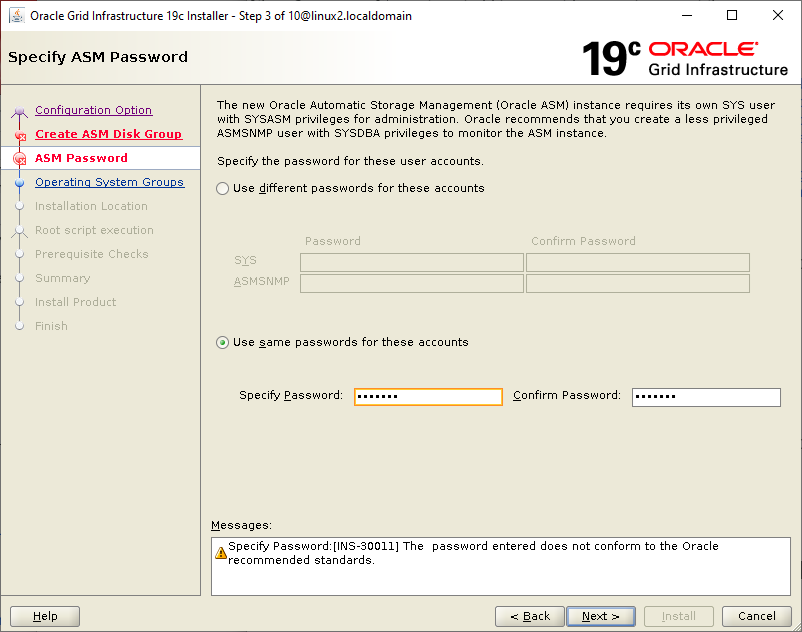
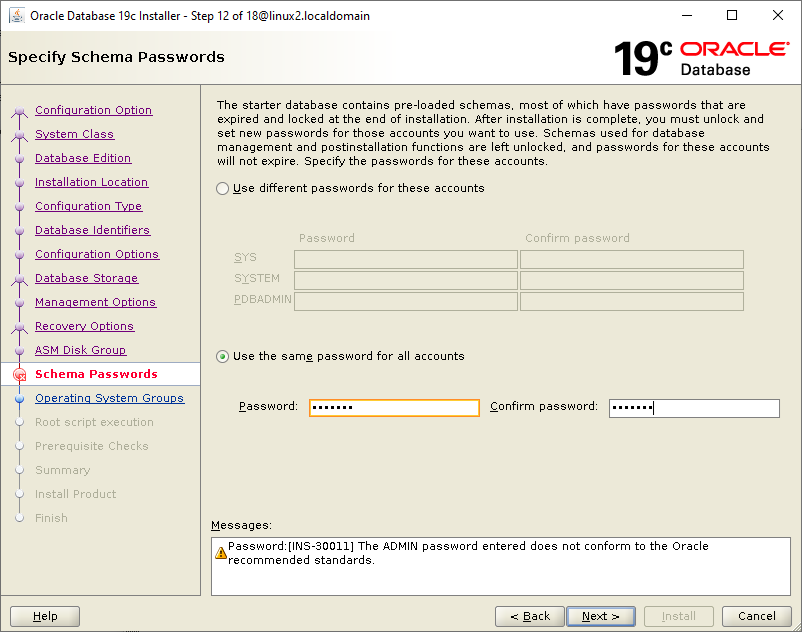
I don’t need separate passwords and am not worried about the password strength here so it scolds me.
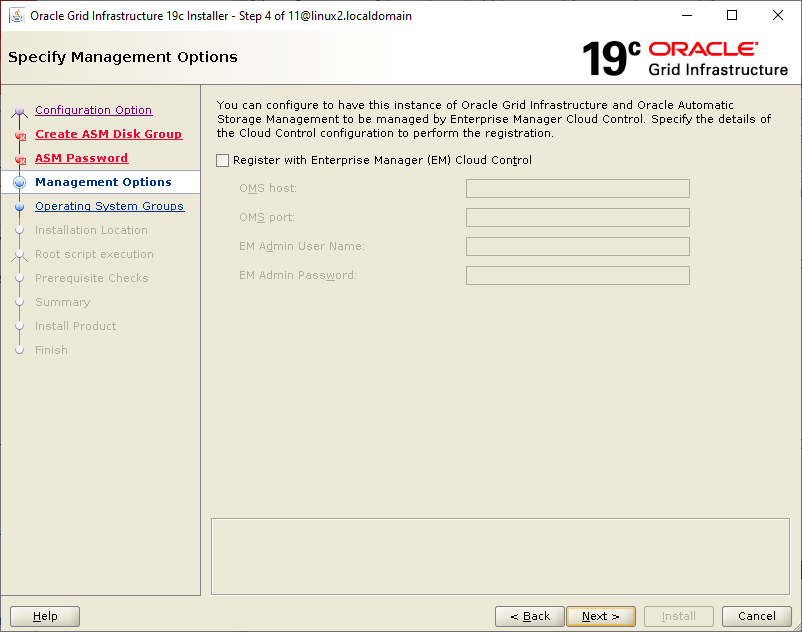
I’m not registering with any cloud.
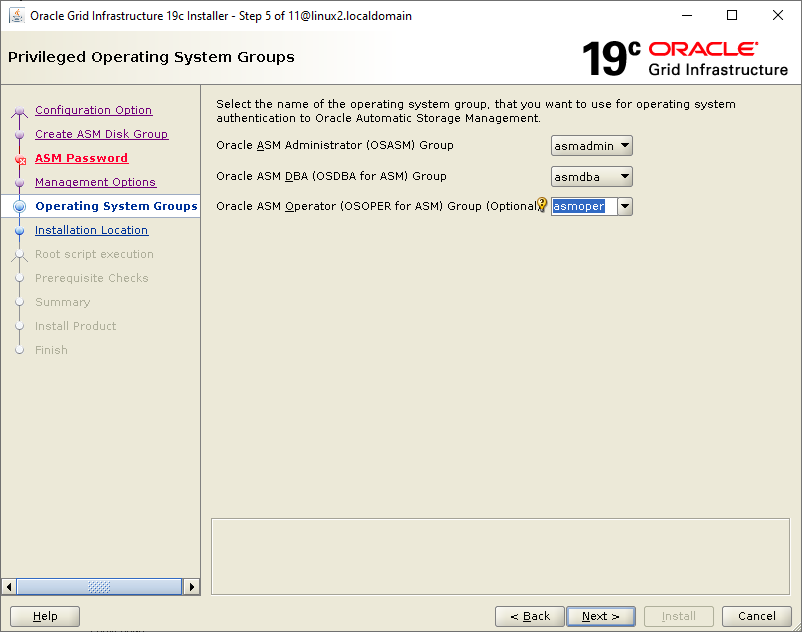
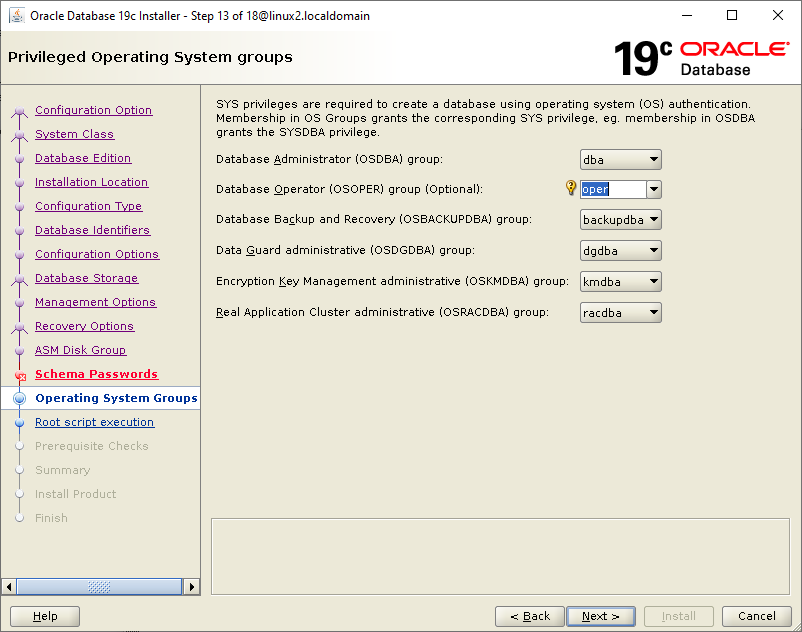
I’m happy with the user ids it finds.
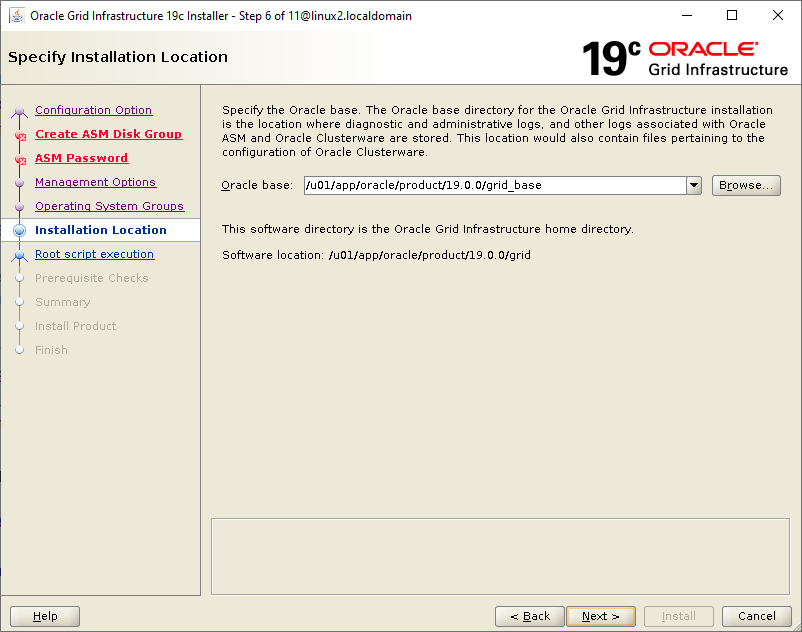
The next screen shows the “grid_base” directory that if you keep it will cause trouble with oraInventory. Change this to the /u01/app/grid directory that we created in preparation.
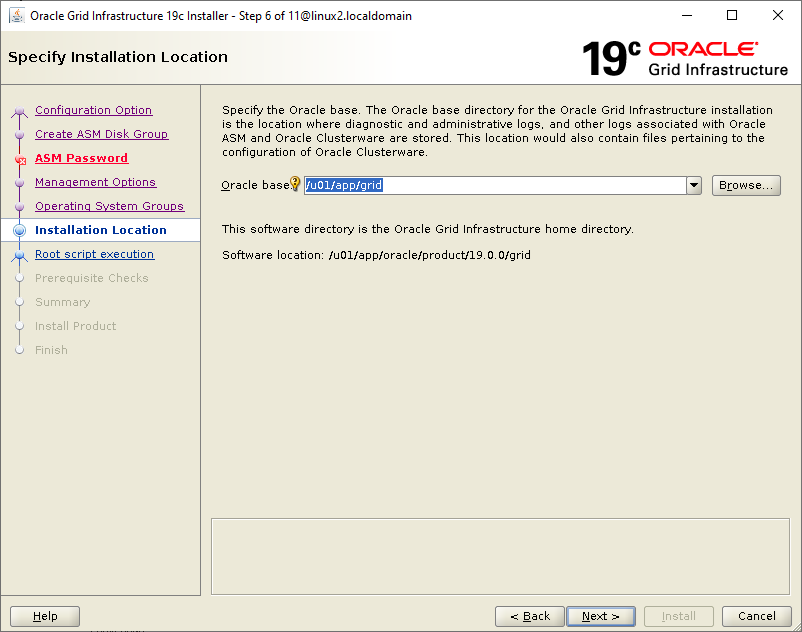
Here is same screen with the directory name corrected.
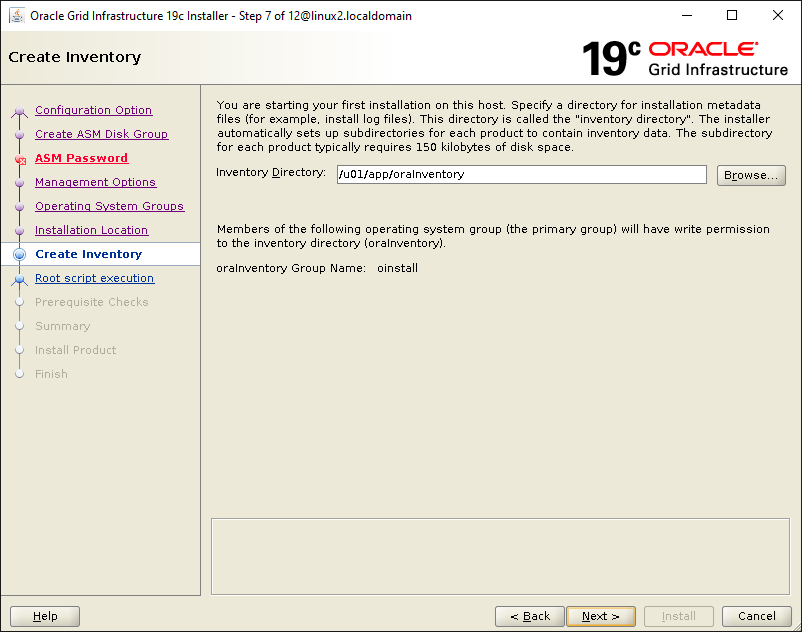
If it suggests creating an oraInventory beneath the product directory, that will be bad. That is going to be under oracle base for the database installation. Make sure it is under /u01/app instead. If you had left the default grid base location earlier, you would. have had the wrong directory here which causes trouble on the Oracle install. It is fixable later though.
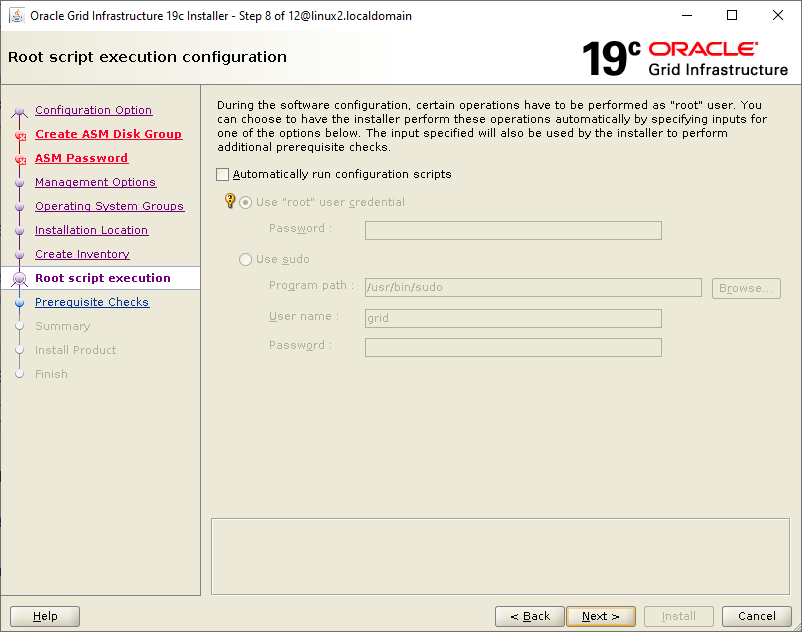
I’m going to run the configuration scripts manually rather than try to give it a way to do it with root.
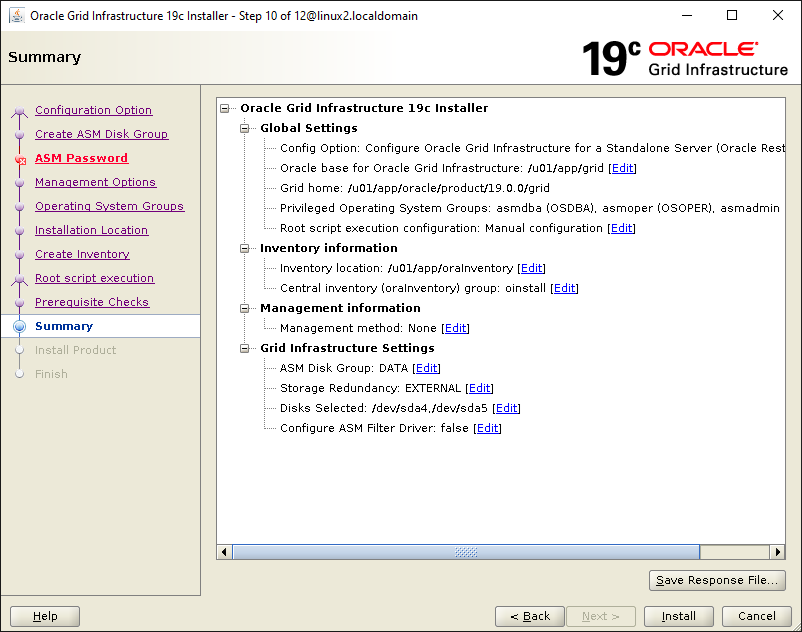
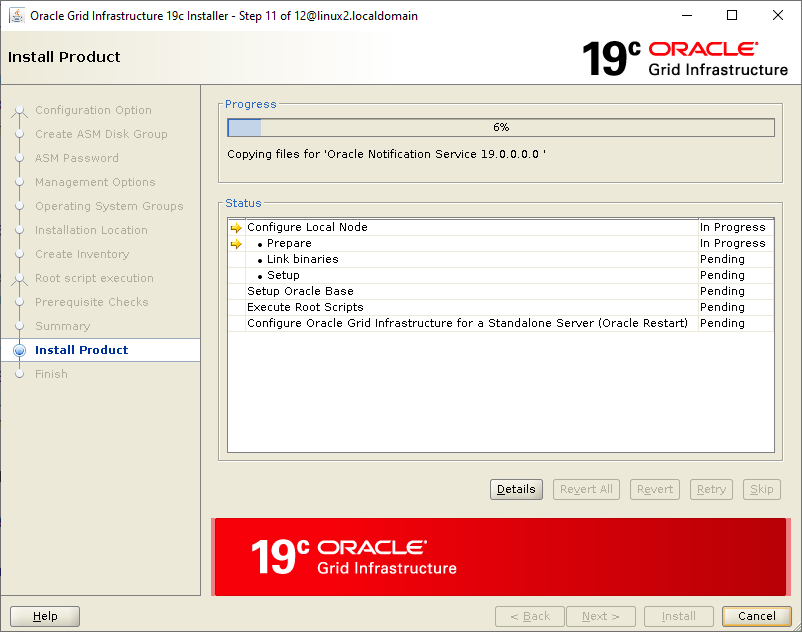
Press the Install button.
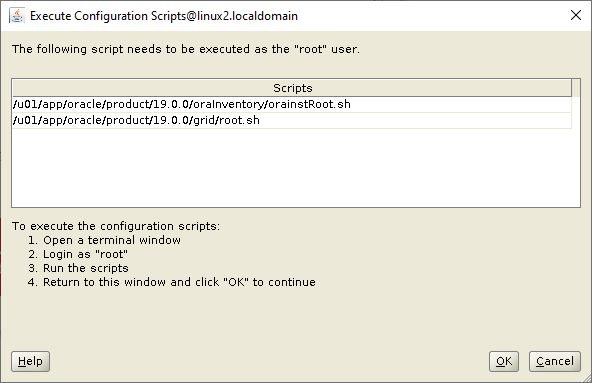
\[root@linux2 bin\]# /u01/app/oraInventory/orainstRoot.sh
Changing permissions of /u01/app/oraInventory.
Adding read,write permissions for group.
Removing read,write,execute permissions for world.
#
Changing groupname of /u01/app/oraInventory to oinstall.
The execution of the script is complete.
And now the tricky one. Cross fingers. I got past the part I failed on OEL 8 and also on 7.8 when I had a greater than 2TB partition for ASM. This runs a while.
\[\[root@linux2 bin\]# /u01/app/oracle/product/19.0.0/grid/root.sh
Performing root user operation.
#
The following environment variables are set as:
ORACLE\_OWNER= grid
ORACLE\_HOME= /u01/app/oracle/product/19.0.0/grid
#
Enter the full pathname of the local bin directory: \[/usr/local/bin\]:
The contents of "dbhome" have not changed. No need to overwrite.
The contents of "oraenv" have not changed. No need to overwrite.
The contents of "coraenv" have not changed. No need to overwrite.
#
#
Creating /etc/oratab file...
Entries will be added to the /etc/oratab file as needed by
Database Configuration Assistant when a database is created
Finished running generic part of root script.
Now product-specific root actions will be performed.
Using configuration parameter file: /u01/app/oracle/product/19.0.0/grid/crs/install/crsconfig\_params
The log of current session can be found at: /u01/app/grid/crsdata/linux2/crsconfig/roothas\_2020-05-08\_10-41-18AM.log
LOCAL ADD MODE
Creating OCR keys for user 'grid', privgrp 'oinstall'..
Operation successful.
LOCAL ONLY MODE
Successfully accumulated necessary OCR keys.
Creating OCR keys for user 'root', privgrp 'root'..
Operation successful.
CRS-4664: Node linux2 successfully pinned.
2020/05/08 10:42:17 CLSRSC-330: Adding Clusterware entries to file 'oracle-ohasd.service'
#
linux2 2020/05/08 10:45:13 /u01/app/grid/crsdata/linux2/olr/backup\_20200508\_104513.olr 724960844
2020/05/08 10:45:15 CLSRSC-327: Successfully configured Oracle Restart for a standalone server
Hooray! Click OK back on the installer window.
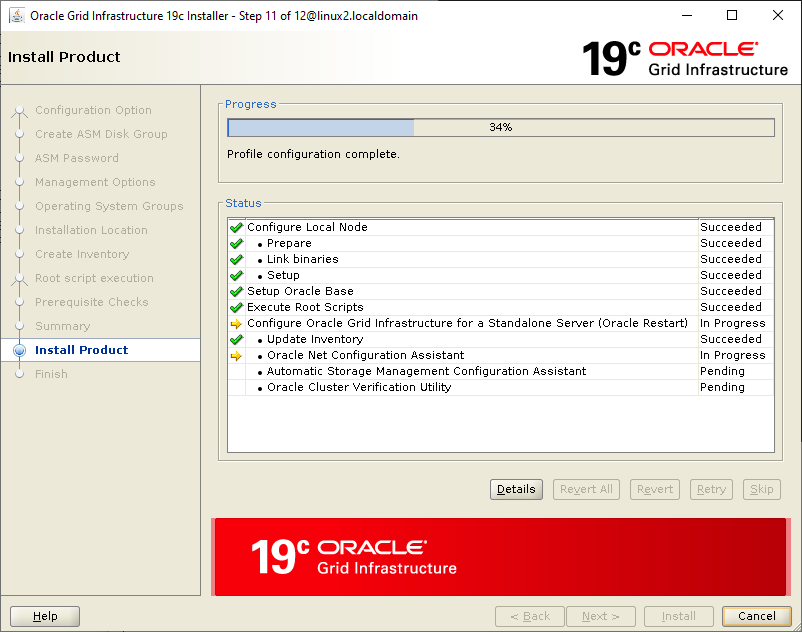
This takes a long time. I see something going on in /tmp/hsperfdata_grid.
And now I get a failure.
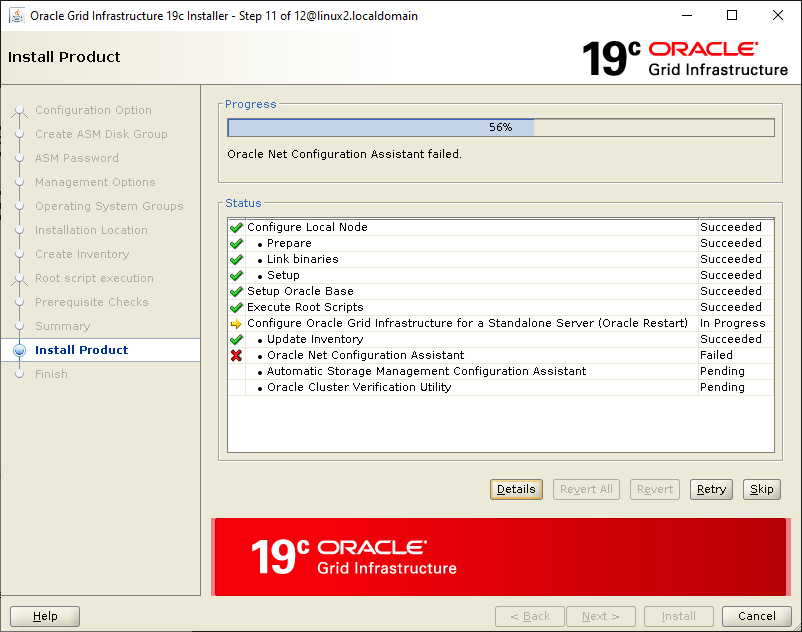
Oracle Net Listener Startup:
The information provided for this listener is currently in use by other software on this computer.
Check the trace file for details: /u01/app/oracle/product/19.0.0/grid\_base/cfgtoollogs/netca/trace\_OraGI19Home1-2005079AM2649.log
Oracle Net Services configuration failed. The exit code is 1
Oracle Net Configuration Assistant failed.
And in the trace log file mentioned above I find:
\[main\] \[ 2020-05-07 10:01:43.447 EDT \] \[ConfigureListener.isPortFree:1292\] Creating ServerSocket on Port:1521, IP Address: linux2.localdomain/92.242.140.21
\[main\] \[ 2020-05-07 10:01:43.447 EDT \] \[ConfigureListener.isPortFree:1328\] Cannot assign requested address (Bind failed)
java.net.PlainSocketImpl.socketBind(Native Method)
java.net.AbstractPlainSocketImpl.bind(AbstractPlainSocketImpl.java:387)
java.net.ServerSocket.bind(ServerSocket.java:375)
java.net.ServerSocket.<init>(ServerSocket.java:237)
oracle.net.ca.ConfigureListener.isPortFree(ConfigureListener.java:1294)
oracle.net.ca.ConfigureListener.startOrStopListener(ConfigureListener.java:1380)
oracle.net.ca.ConfigureListener.typicalConfigure(ConfigureListener.java:369)
oracle.net.ca.SilentConfigure.performSilentConfigure(SilentConfigure.java:212)
oracle.net.ca.InitialSetup.<init>(NetCA.java:4325)
oracle.net.ca.NetCA.main(NetCA.java:460)
\[main\] \[ 2020-05-07 10:01:43.447 EDT \] \[ConfigureListener.isPortFree:1341\] Returning is Port 1521 free: false
After a little googling and remembering advice I had read in the Oracle Base document, I found I had failed to update /etc/hosts with the name of this computer and the IP address. I added it to /etc/hosts:
\[root@linux2 bin\]# cat /etc/hosts
127.0.0.1 localhost localhost.localdomain localhost4 localhost4.localdomain4
::1 localhost localhost.localdomain localhost6 localhost6.localdomain6
192.168.2.81 linux2.localdomain linux2
After this it completed the net configuration assistant, but failed the ASM assistant:
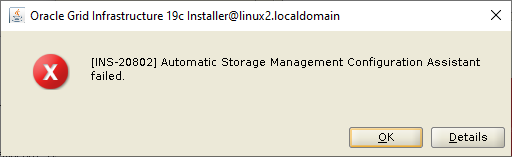
\[FATAL\] \[DBT-30002\] Disk group DATA creation failed.
ORA-15018: diskgroup cannot be created
ORA-15031: disk specification '/dev/sda5' matches no disks
ORA-15025: could not open disk "/dev/sda5"
ORA-27041: unable to open file
Automatic Storage Management Configuration Assistant failed.
Some google searching leads me to believe that we have to manually assign ownership of the device files for the ASM partitions. Wish that had been mentioned in the documentation (or if it was, that I had noticed it). I proceeded with the “udev” rule to change the ownership of the device files as mentioned above. You should have already done that. At that point the /dev/sda[45] files were changed to grid:oinstall which takes care of it.
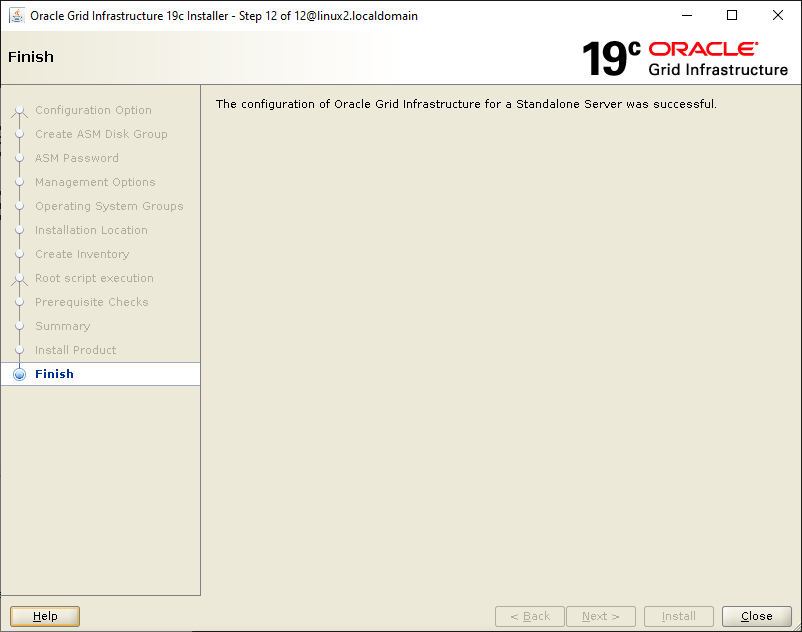
Pressed continue and it finished. Yeaaaaaa!
Testing Grid Installation
The next section in the install document is Testing the Oracle Automatic Storage Management Installation. I presume the sid I want is +ASM. When I look in the grid home dbs directory I see dbs/init.ora with a db_name=’ORCL’, but in the dbs directory I see some files with ‘+ASM’ in the name. I have zero experience with grid yet, so I’m guessing.
\[grid@linux2 grid\]$ export ORACLE\_HOME=/u01/app/oracle/product/19.0.0/grid
\[grid@linux2 grid\]$ export ORACLE\_SID=+ASM
\[grid@linux2 grid\]$ $ORACLE\_HOME/bin/asmcmd lsdg
State Type Rebal Sector Logical\_Sector Block AU Total\_MB Free\_MB Req\_mir\_free\_MB Usable\_file\_MB Offline\_d
MOUNTED EXTERN N 512 512 4096 4194304 2097152 2097040 0 2097040
Must have guessed right. That looks like both my 1 TB partitions were combined into a single group as expected. The ASM instance must be runing (a ps listing shows processes with +ASM in the name as well as a tnslsnr).
I can also fire up $ORACLE_HOME_/bin/asmca_ and look around.
The next section of the document informs us that every time we do any OS upgrades we need to relink the grid executables and provides some instructions. That’s beyond the scope for now, but try to remember this for the future.
I won’t be using ACFS which is storage on stuff other than the database. And I don’t have access to support, so I don’t have any patches to apply.
That’s it for grid.
Installing Oracle Database
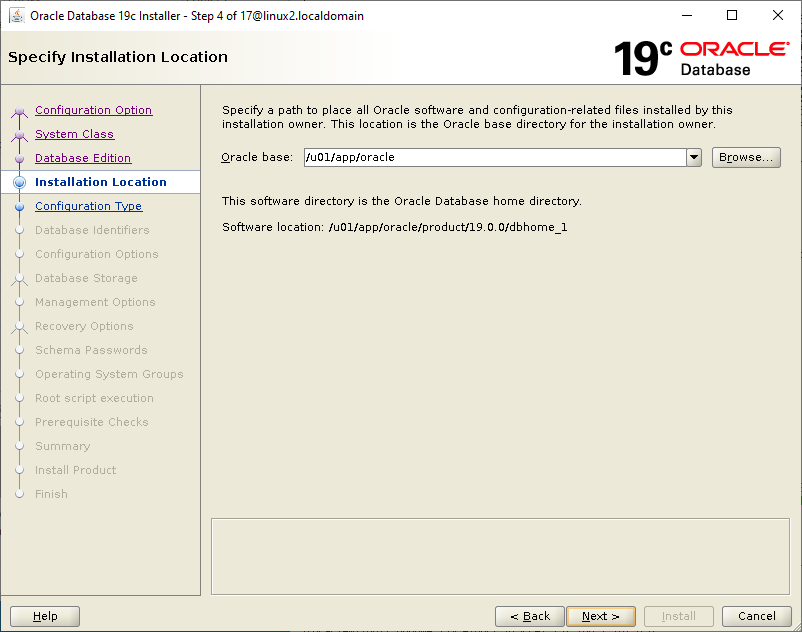
I already have to directories listed in step 2 of running the wizard, so all I need to do is create dbhome_1. I sudo su - oracle, and unpack my zip file.
\[oracle@linux2 19.0.0\]$ mkdir -p /u01/app/oracle/product/19.0.0/dbhome\_1
\[oracle@linux2 19.0.0\]$ cd /u01/app/oracle/product/19.0.0/dbhome\_1
\[oracle@linux2 dbhome\_1\]$ unzip -q /mnt/g/lee/LINUX.X64\_193000\_db\_home.zip
\[oracle@linux2 dbhome\_1\]$ export DISPLAY=192.168.2.162:0.0 # you may be going local, but you will still need to set it and perhaps do xhost+ first
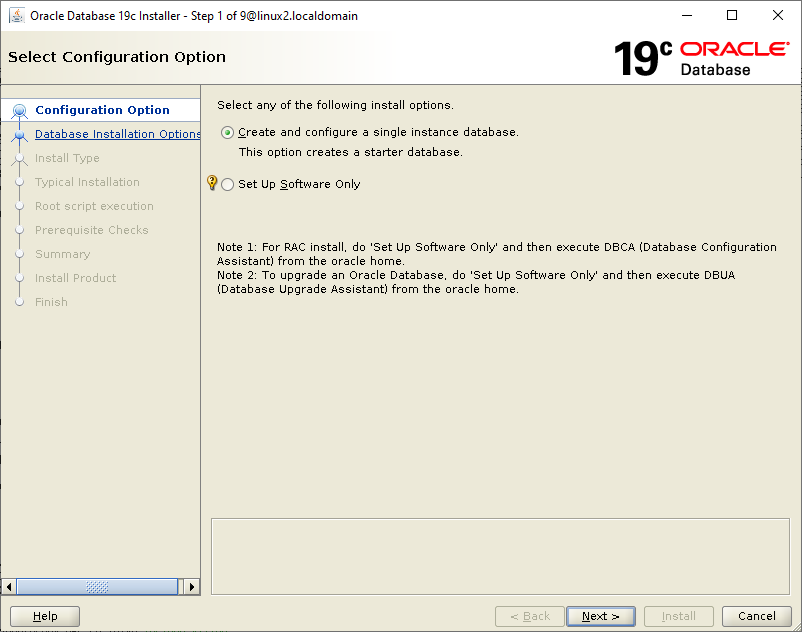
\[oracle@linux2 dbhome\_1\]$ ./runInstaller
Launching Oracle Database Setup Wizard...
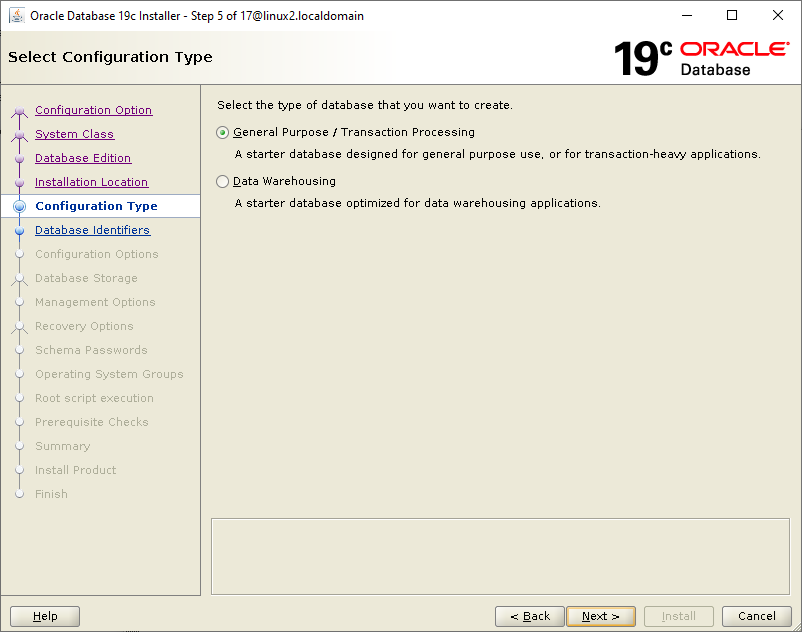
I’ll be creating the single instance database.
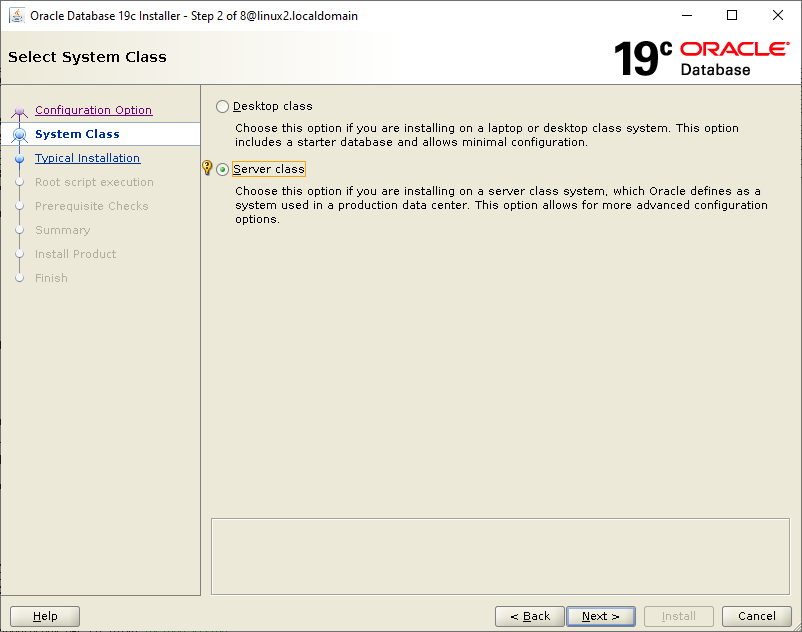
After looking around a little bit I decided the “Desktop class” installation would be too limiting. I want to be able to play here which includes connecting from other machines. I picked “Server class”.
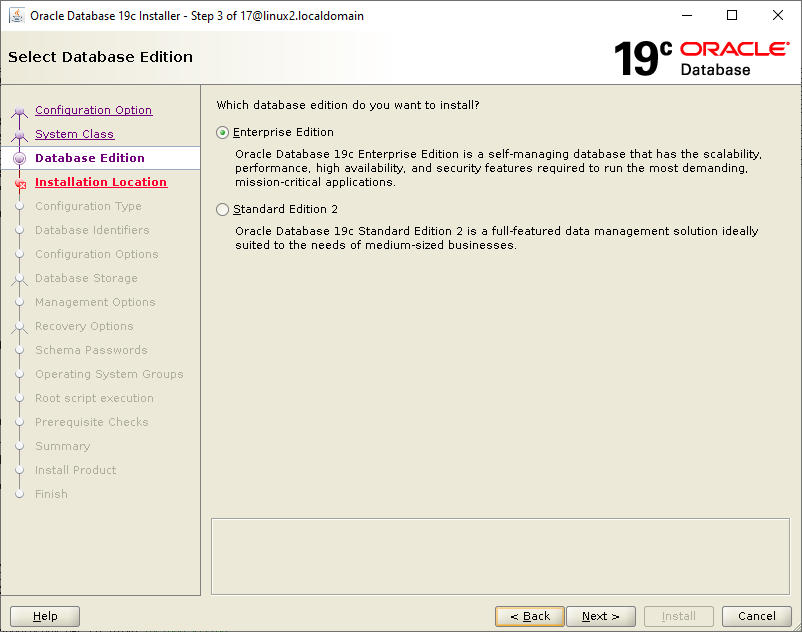
Again, because I’m using this database to learn about big iron stuff, I picked Enterprise Edition. I don’t “need” it, but I want to be able to explore it. YMMV.
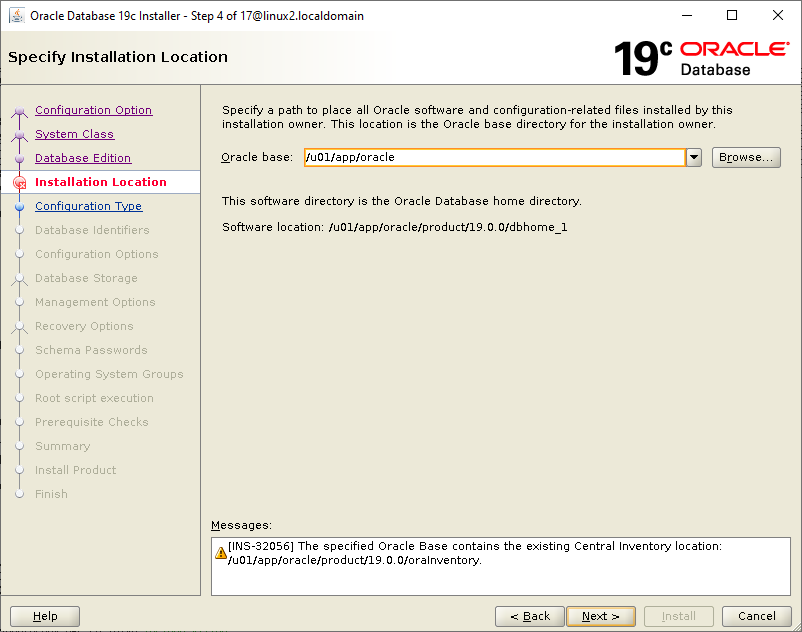
Note that the next section describes an issue I subsequently fixed in the grid install process. I had made a mistake on the oracle inventory location. I leave this here in case you find yourself in the same situation.
Hmm. Is this a permission issue?
\[root@linux2 19.0.0\]# ls -l
total 8
drwxr-xr-x. 68 oracle oinstall 4096 May 7 19:27 dbhome\_1
drwxr-x---. 85 root oinstall 4096 May 7 09:18 grid
drwxr-xr-x. 7 grid oinstall 84 May 7 10:32 grid\_base
drwxrwx---. 5 grid oinstall 92 May 7 19:20 oraInventory
\[root@linux2 19.0.0\]# chown grid grid
\[root@linux2 19.0.0\]# chmod 775 \*
\[root@linux2 19.0.0\]# ls -l
total 8
drwxrwxr-x. 68 oracle oinstall 4096 May 7 19:27 dbhome\_1
drwxrwxr-x. 85 grid oinstall 4096 May 7 09:18 grid
drwxrwxr-x. 7 grid oinstall 84 May 7 10:32 grid\_base
drwxrwxr-x. 5 grid oinstall 92 May 7 19:20 oraInventory
I had to exit the installer and start it again. This time when I got to the step for Oracle base it did not complain immediately, but did give a popup when I continued.
I see plenty of questions about this but don’t see an explanation I can follow other than the grid install was supposed to put the inventory in /u01/app/oraInventory. I’m not sure why it did not the first time (In my latest attempt as documented in this blog I correctly located it at /u01/app/oraInventory). I found this link on how to move oraInventory (https://logic.edchen.org/how-to-move-central-inventory/). I changed /etc/OraInst.loc:
\[root@linux2 19.0.0\]# cat /etc/oraInst.loc
#inventory\_loc=/u01/app/oracle/product/19.0.0/oraInventory
inventory\_loc=/u01/app/oraInventory
inst\_group=oinstall
The existing files are owned by grid, but since the group is oinstall we should be good. You may need to make sure any existing log directories are group writeable first. As user grid::
\[grid@linux2 oraInventory\]$ cp -rp /u01/app/oracle/product/19.0.0/oraInventory /u01/app
\[grid@linux2 oraInventory\]$ pwd
/u01/app/oraInventory
\[grid@linux2 oraInventory\]$ cp /etc/oraInst.loc .
\[grid@linux2 grid\]$ cd/u01/app/oracle/product/19.0.0/grid
\[grid@linux2 grid\]$ cp /etc/oraInst.loc .
Now back as oracle user I try the installer again. We are past that hurdle and continuing. Note that since doing this I did deinstall of both the database and grid and started over.
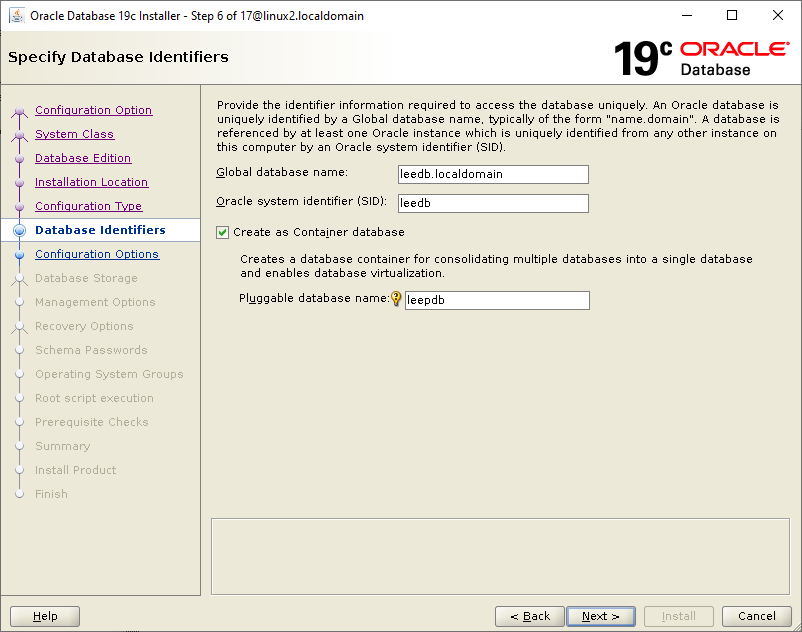
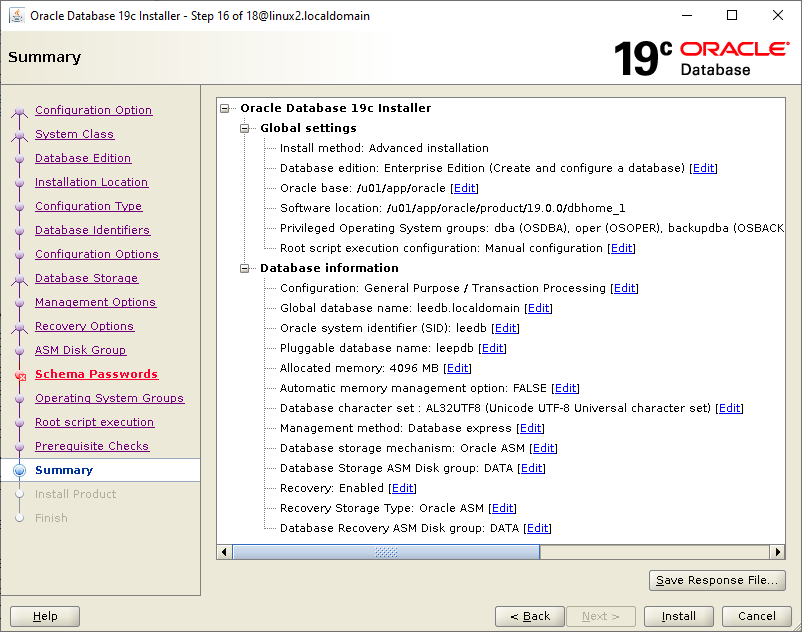
I’m customizing my database name and also going to create it as a container database. Total overkill, but I want to play with pluggable database containers.
It defaults to NOT enabling automatic memory management because there is more than 4GB of memory. Not sure I understand that. Note that you have to move the slider to get close to 4.096 before you can edit the text box. I don’t know why.
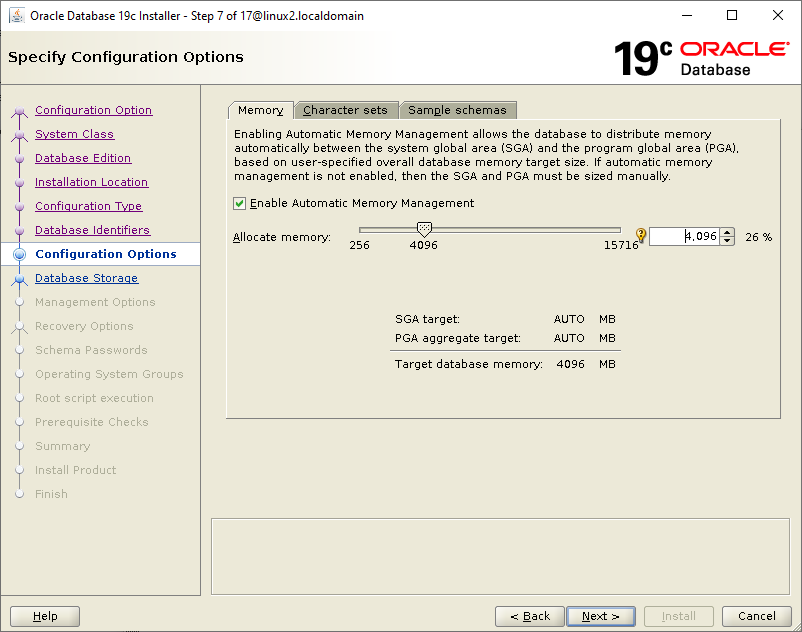
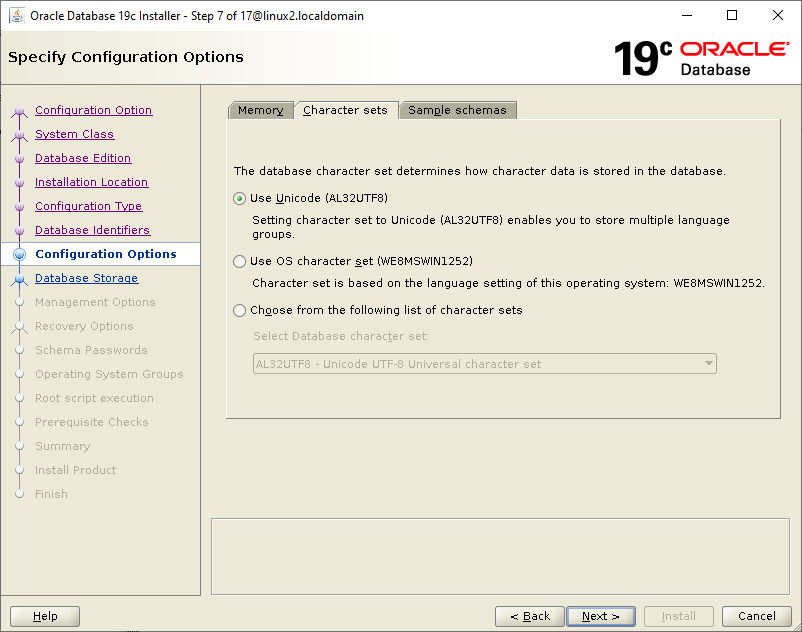
Although I have no plans to use anything but ascii, I’ll go with the default because that is what most large corporations do, I think.
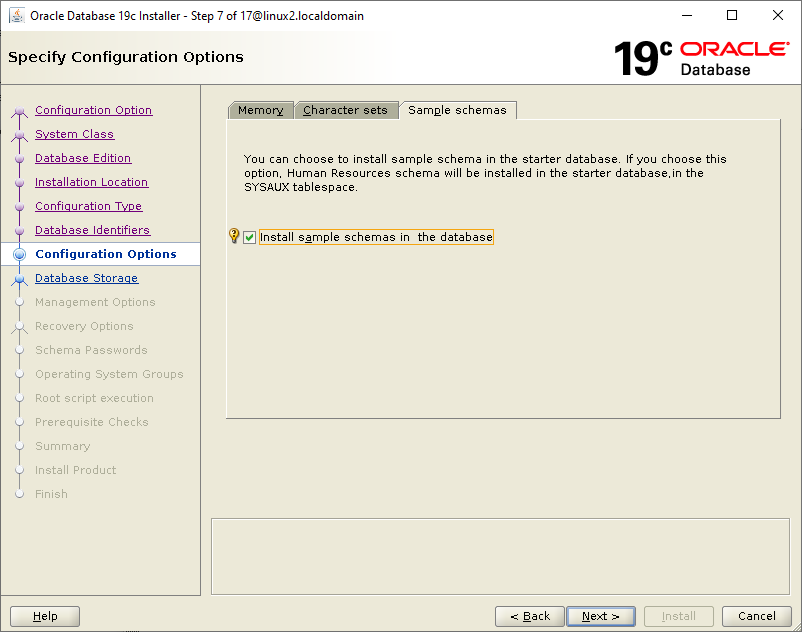
I’ll go ahead and install the sample schemas. They often make a good base for doing examples.
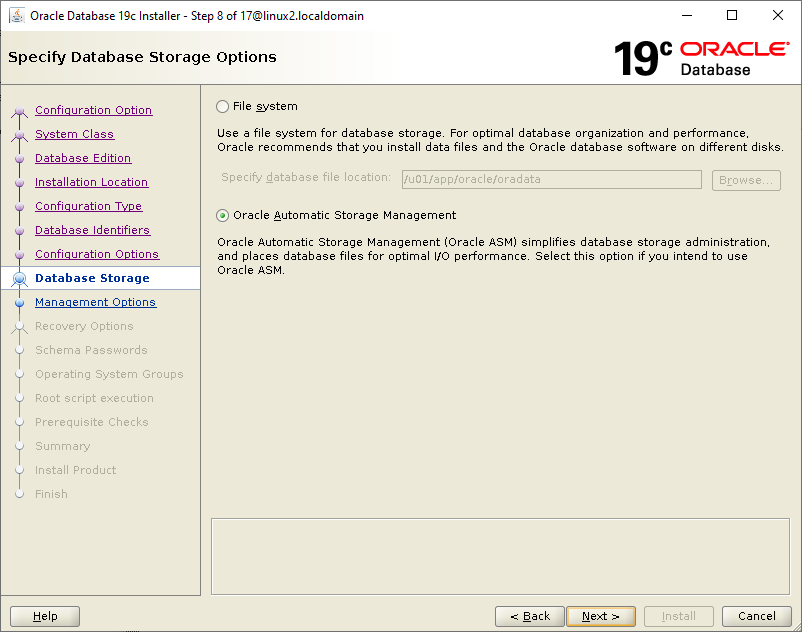
I will be using ASM.
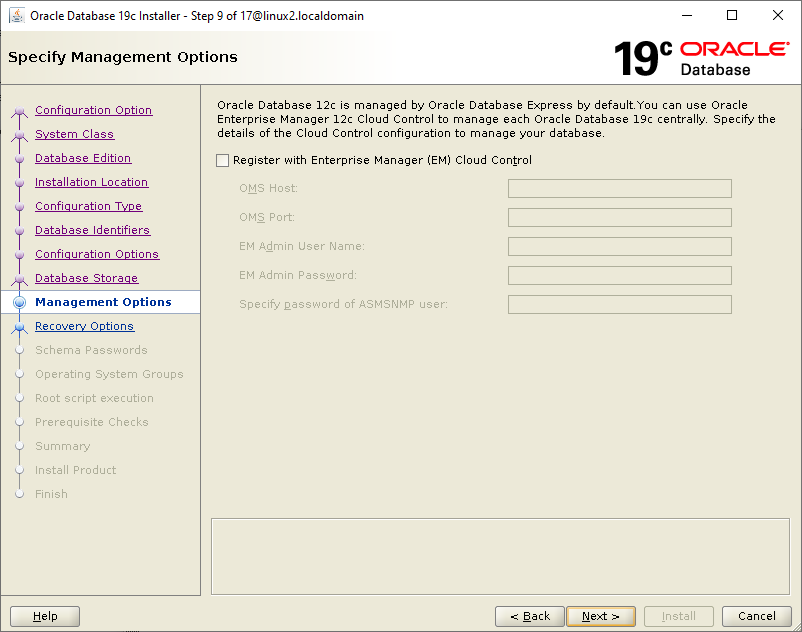
No cloud for me.
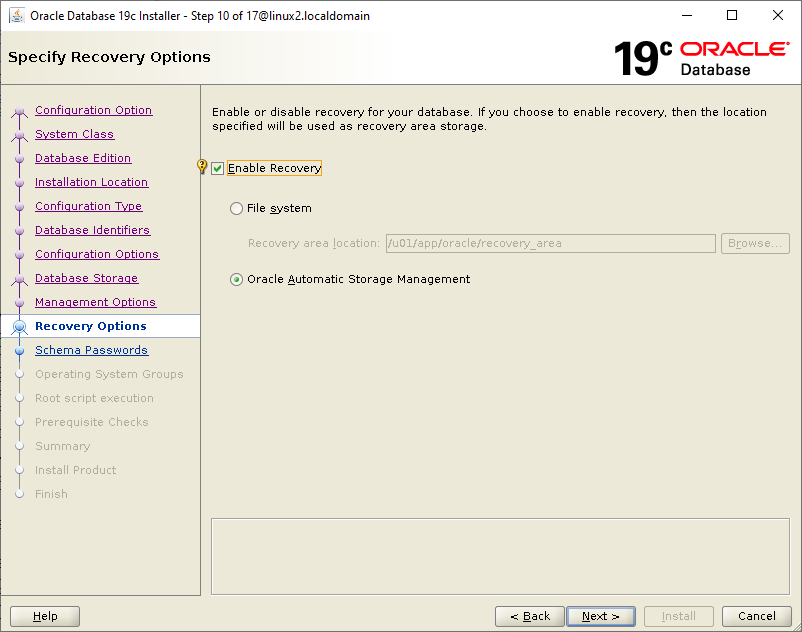
I will not be putting anything on this database I can’t afford to lose. In fact, I expect to tear it down and start over many times. But I tried it without recovery being set and wound up with an error later. I’ll enable recovery.
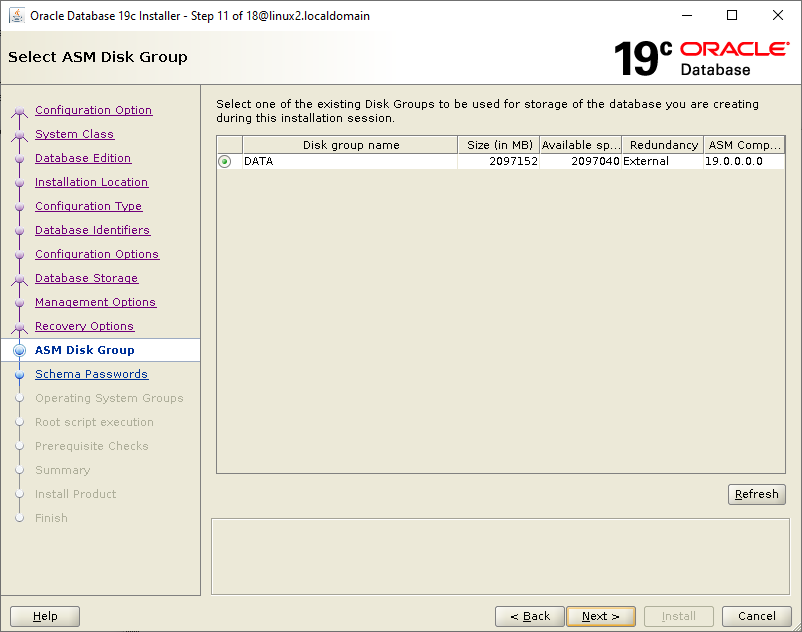
It found my ASM disc group.
Yes, I’m a bad person with passwords on this database.
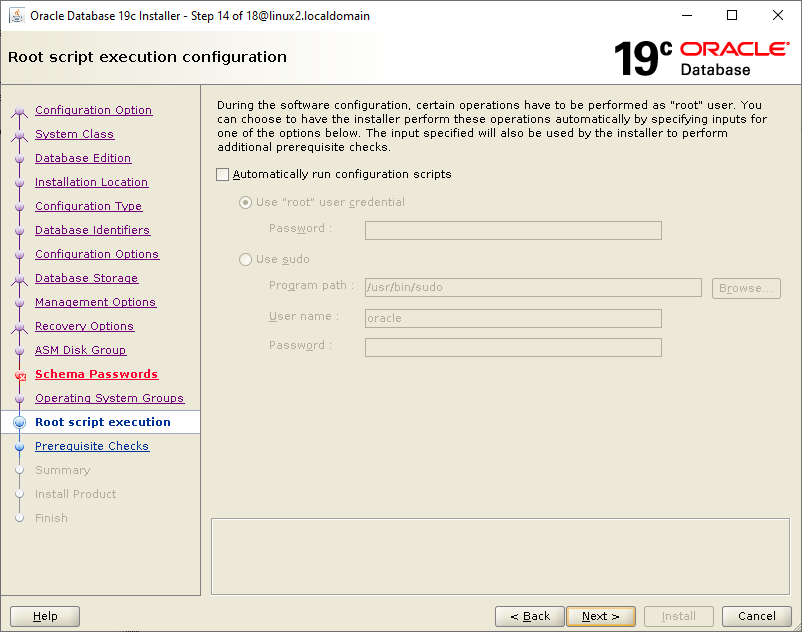
Just like with the grid install, I prefer to run the root scripts myself separately.
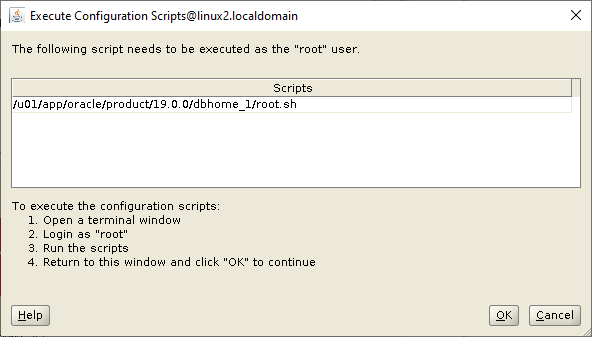
\[root@linux2 ~\]# /u01/app/oracle/product/19.0.0/dbhome\_1/root.sh
Performing root user operation.
#
The following environment variables are set as:
ORACLE\_OWNER= oracle
ORACLE\_HOME= /u01/app/oracle/product/19.0.0/dbhome\_1
#
Enter the full pathname of the local bin directory: \[/usr/local/bin\]:
The contents of "dbhome" have not changed. No need to overwrite.
The contents of "oraenv" have not changed. No need to overwrite.
The contents of "coraenv" have not changed. No need to overwrite.
#
Entries will be added to the /etc/oratab file as needed by Database Configuration Assistant when a database is created
Finished running generic part of root script.
Now product-specific root actions will be performed.
Oracle Trace File Analyzer (TFA - Standalone Mode) is available at : /u01/app/oracle/product/19.0.0/dbhome\_1/bin/tfactl
#
Note :
1. tfactl will use TFA Service if that service is running and user has been granted access
2. tfactl will configure TFA Standalone Mode only if user has no access to TFA Service or TFA is not installed
#
\[root@linux2 ~\]#
Pressed the OK button on the root dialog.

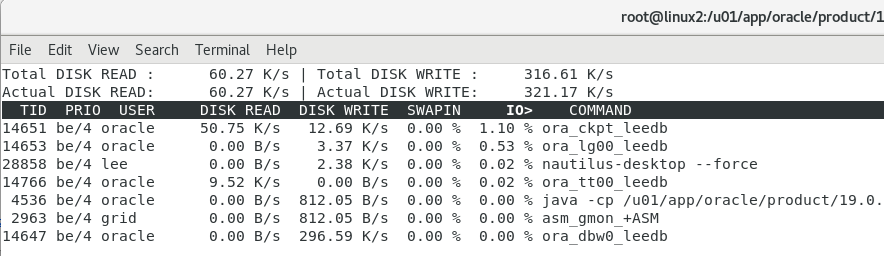
Running the command “iotop -o -d 5” I can see the database is writing to disk. At least that is better than just watching the installer sit there with “In Progress”. As a side note the Applications/System Tools/System Monitor app on gnome is not very impressive. There has to be a better tool.
I found some logs I could watch
[ oracle@linux2 cfgtoollogs]$ pwd /u01/app/oracle/product/19.0.0/dbhome_1/cfgtoollogs [oracle@linux2 cfgtoollogs]$ tail -f oracle.server_2020-05-08_09-30-54-AM.log INFO: Skipping line: 38% complete INFO: Skipping line: 38% complete INFO: Skipping line: 42% complete INFO: Skipping line: 42% complete INFO: Skipping line: 45% complete INFO: Skipping line: 45% complete INFO: Skipping line: 48% complete INFO: Skipping line: 48% complete INFO: Skipping line: Completing Database Creation INFO: Skipping line: Completing Database Creation
Finally it finishes.
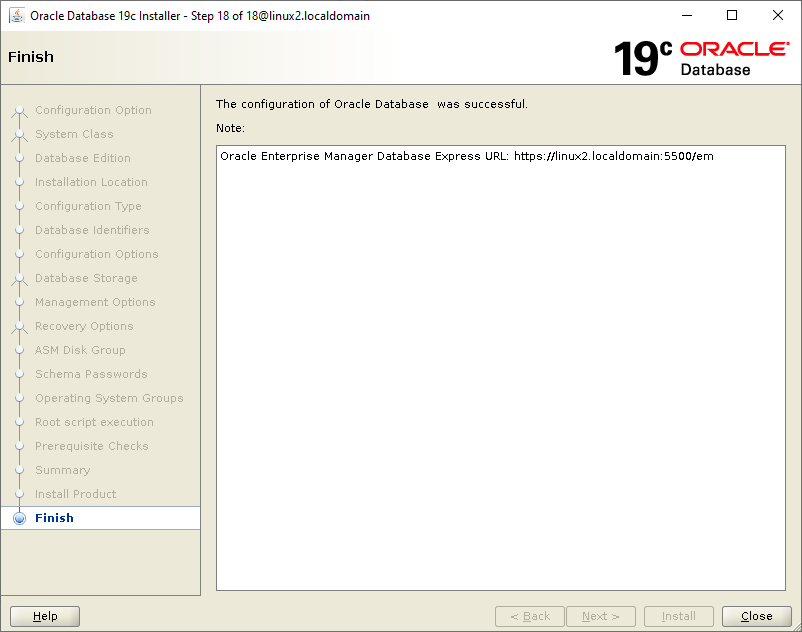
But Firefox complains with that address - something about security. I found links to solutions having to do with XDB or private certificates or some such. I spent several hours looking without success. Someone with access to support might be able to figure it out. I might come back to that. I don’t need it though.
The database is installed and functioning. Shutting down and starting up Linux brings the database down and up gracefully.
grid and oracle login profiles
I configured the .bash_profile of the oracle user with the following lines.
export PATH umask 022 export ORACLE_HOSTNAME=$(hostname) export ORAENV_ASK=NO export ORACLE_SID=leedb . oraenv -s
Now I can do:
sqlplus / as sysdba
# or
sqlplus system
without having to set any more variables.
I configured the .bash_profile of the grid user with the following lines:
umask 022
export ORACLE\_HOSTNAME=$(hostname)
export ORACLE\_HOME=/u01/app/oracle/product/19.0.0/grid
export ORACLE\_SID="+ASM"
PATH=${PATH}:${ORACLE\_HOME}/bin
Now when I log in as user grid I can issue srvctl commands. See below.
Starting and Stopping
If you have not already done so, read https://docs.oracle.com/en/database/oracle/oracle-database/19/admin/configuring-automatic-restart-of-an-oracle-database.html#GUID-EA0104A2-B256-4866-9C8A-9B69F8D0F24E
If you use sqlplus to shutdown your database you will be in for a surprise when you try to start it again. You can recover. After thinking I had lost the diskgroup I found I could get it all going again by logging in as “grid” and running a few commands:
srvctl start diskgroup -diskgroup data
srvctl start database -db leedb
In general you can let the normal Linux shudtown and startup take care of things. When you are ready, you need to learn about srvctl which is kind of the point of setting up the gird “restart” structure.
Sqldeveloper
You may be able to use yum to get sqldeveloper, but I downloaded the rpm. Before installing it you need the java sdk.
\[root@linux2 jvm\]# yum install java-1.8.0-openjdk-devel ...
\[root@linux2 jvm\]# yum install sqldeveloper-19.1.0.094.2042.noarch.rpm
It installs in /usr/local/bin. The first time you run sqldeveloper it prompts for the java sdk location. There are some soft links that take care of adjusting for upgrades. Answer with:
/usr/lib/jvm/java-openjdk
which will point to the latest and greatest that you just installed.
Conclusion
This was much, much harder than it should have been. I spent more hours on this than I am willing to admit. Granted, I was learning some Linux things I didn’t know and some Oracle administration things I didn’t know as I was going, but even with that background this was a very hard slog.
Access to Oracle support would have made it a little easier, but not that much. I do not know why it is such a cluster (pun intended).
I hope a few people might find this useful.